Storm Chaser
Travis Nickey’s Tamron lenses help him capture Mother Nature’s beauty, and fury.
Share the article:
More Photo Tips | Video Gallery | Photo Gallery | Enewsletter sign-up
By Jenn Gidman
Images by Travis Nickey
Travis Nickey wasn’t always into storm chasing. “I did see Twister back in the day and thought it looked awesome, but where I’d lived up till then—Houston growing up, then along the East Coast—didn’t really have many photogenic storms worth chasing,” he says.
That changed when Travis moved to Colorado in 2018. He was on a landscape photography excursion in the western part of the state with a friend when a random spring storm swept through and changed the trajectory of his photographic passion. “That storm was incredibly fun to take pictures of,” he says.
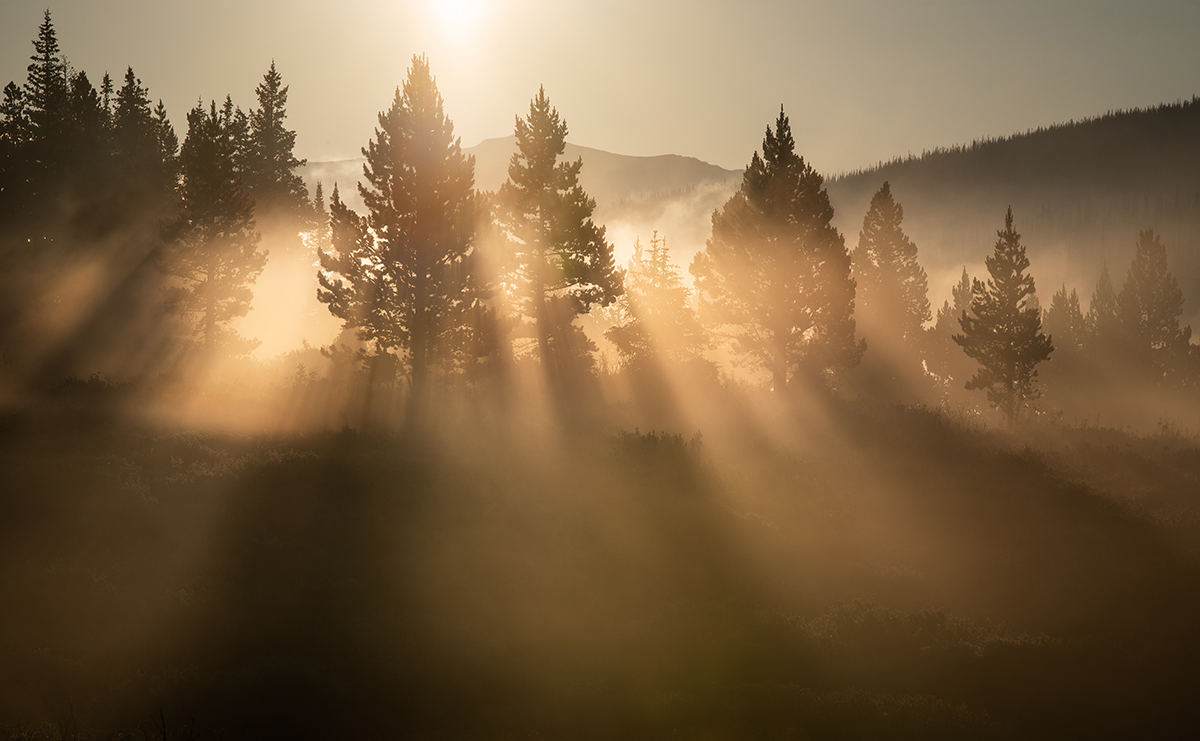
Today, Travis has carved out a creative niche for himself through weather photography that's as electrifying as the storms he chases. Armed with his camera and Tamron lenses—the Tamron SP 24-70mm F/2.8 Di VC USD G2 zoom and the SP 70-200mm F/2.8 Di VC USD G2 telephoto—he now documents the most dynamic and moody moments Mother Nature has to offer through storm photography. “The 24-70mm G2 is ideal for capturing the grandeur of entire storm structures,” he says. “Meanwhile, the 70-200mm G2 is my go-to lens for detail shots, tight lightning bolts, or cloud-to-cloud phenomena. Both lenses are so sharp, and being able to stop down to F2.8 is crucial in some funky lighting conditions.”
TRAVIS’ QUICK TIPS
Track the storm.
Access weather models for a general overview of potential storm formations. Websites like Pivotal Weather provide access to various models, including European and North American ones, along with shorter-range models with more detailed insights. However, keep in mind that weather can change rapidly, so it's crucial to revisit these models closer to your chase date.
70-200mm (200mm), F18, 1/320 sec., ISO 100
Click image to view larger
To track storms as they develop, use radar and satellite apps like RadarScope and SatSquatch. RadarScope in particular offers features like storm tracking, speed, hail size, and alerts for thunderstorm or tornado warnings. These tools help you in weather photography to position yourself in advance, follow the storm's progression, and gauge its intensity.
Head out later in the day.
Although you can't control when storms occur, storms typically tend to kick off in the late afternoon, coinciding with temperature and dew point peaks. With storm photography the magic truly unfolds between the golden hour before sunset and the blue hour, which offers perfect conditions for longer exposures and enhances the chances of capturing lightning bolts against a darkening sky. Moreover, when storm cells are illuminated by the warm, soft hues of the setting sun, it adds an extra layer of drama to your storm photos.
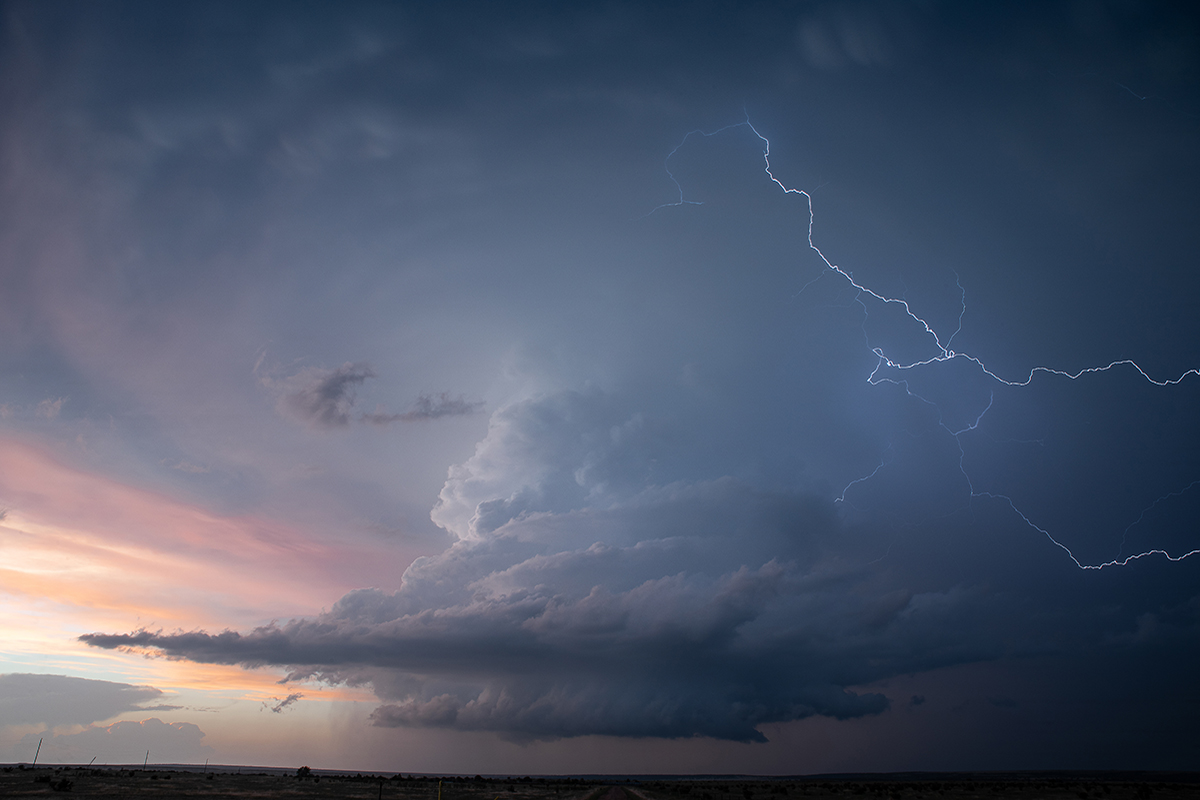
24-70mm (24mm), F20, 1.3 sec., ISO 100
Click image to view larger
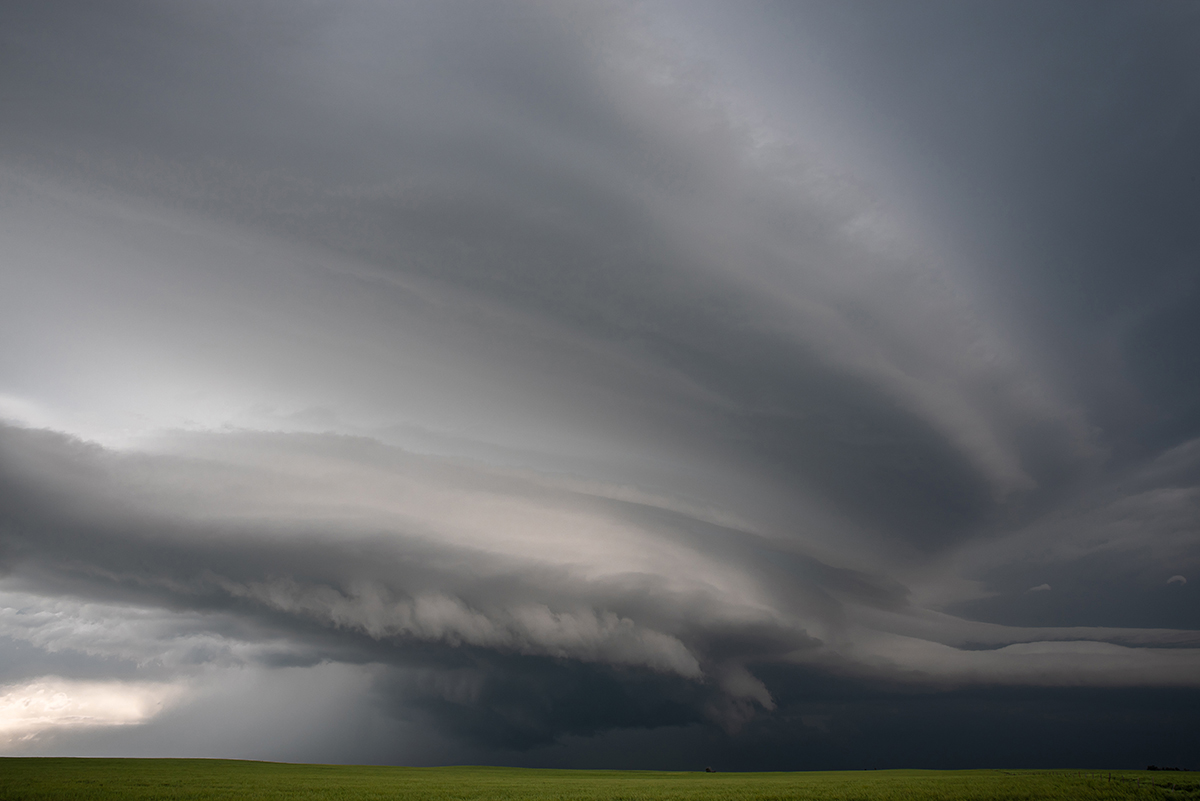
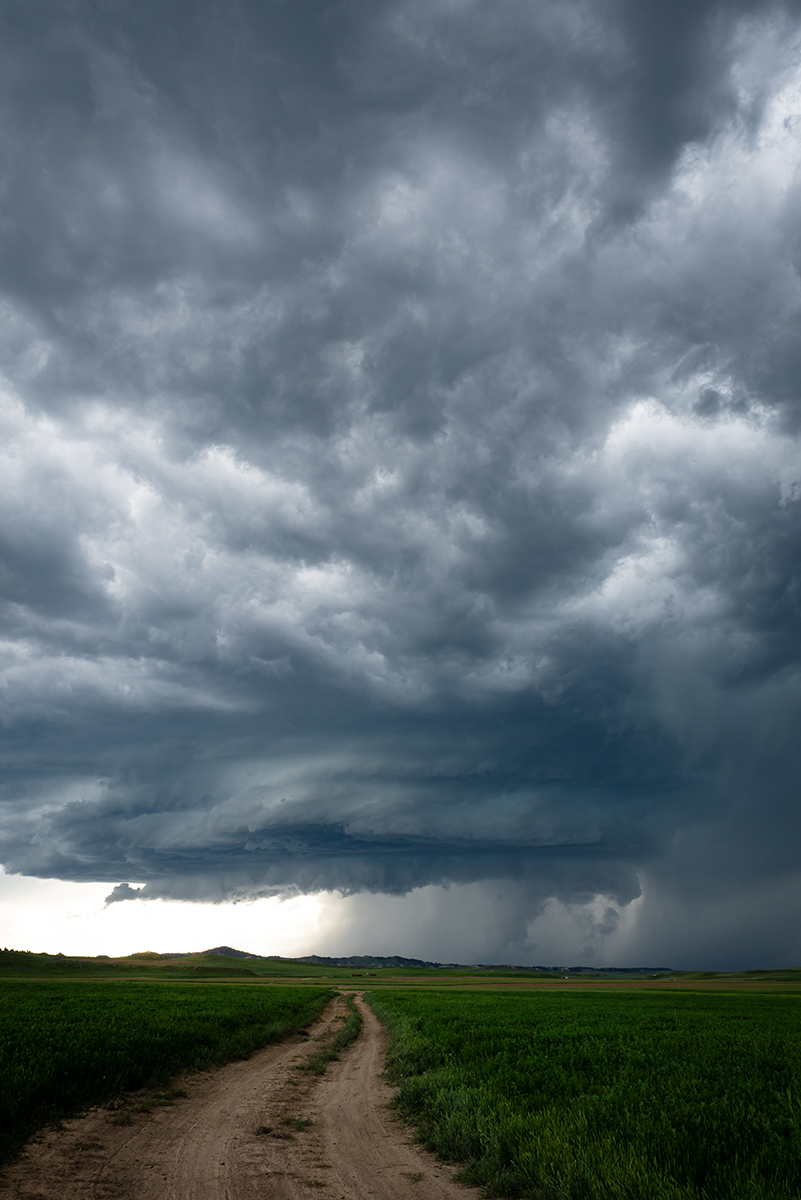
Position yourself for the best composition.
I’ll set up my tripod on the east side of the storm, where I’ll often find the most dramatic storm structures. There’s more opportunity there to reposition for more shots as the storm system evolves. I try to train my camera on distinctive features sculpted by the wind and keep an eye on the southeast side of the storm, where light can pierce through the cloud cover, illuminating the storm's most captivating characteristics.
24-70mm (31mm), F3.5, 1.0 sec., ISO 500
Click image to view larger
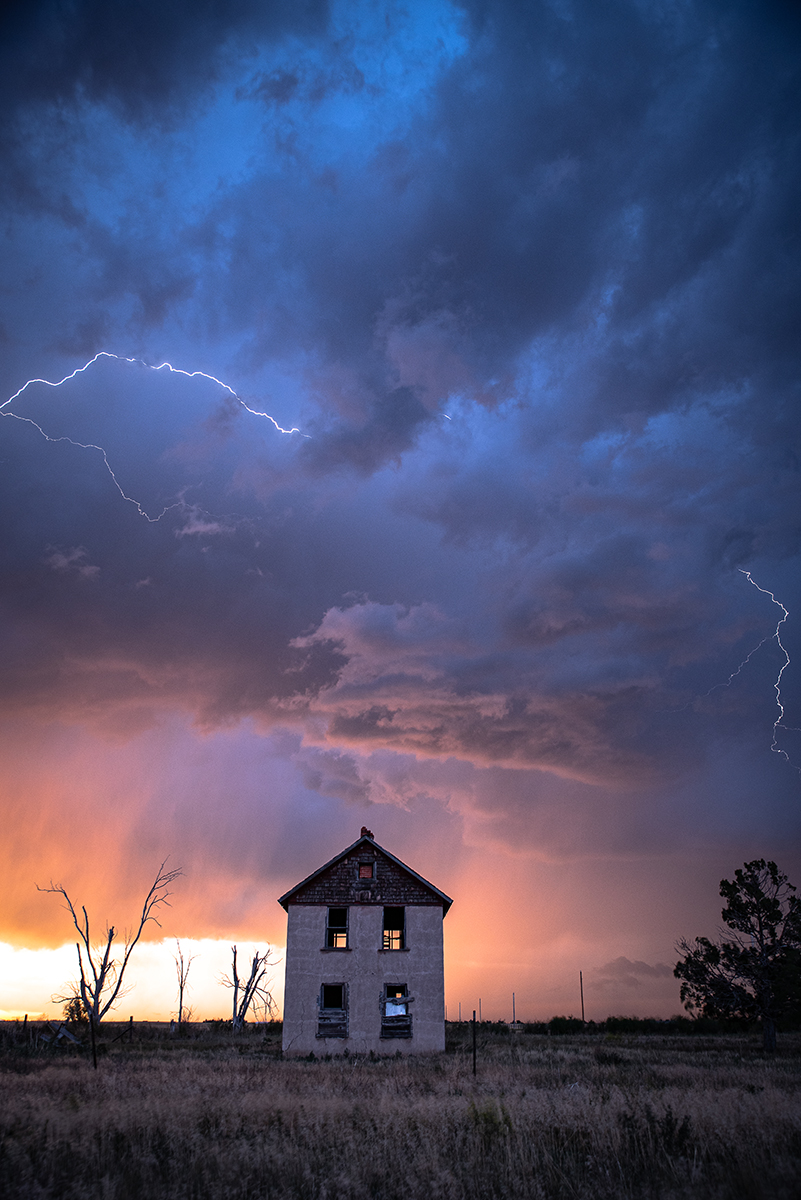
Expose correctly.
Balancing exposure in weather photography can be nuanced, so be adaptable. I typically rely on my histogram to guide me. This flexibility is particularly useful when I’m dealing with the dynamic interplay of dark storm clouds and the sometimes limited foreground options while shooting on the open plains. Storm photography also means accounting for the ever-present unpredictability of lightning, which further complicates exposure.
24-70mm (24mm), F16, 1/13 sec., ISO 100
Click image to view larger
24-70mm (35mm), F22, 1/10 sec., ISO 100
Click image to view larger
Practice photographing lightning.
Use a lightning trigger, especially during the brighter times of the day. This device senses the flash of lightning and triggers your camera to fire, although capturing lightning remains unpredictable due to its speed. As evening approaches, adjust camera settings by increasing the aperture to F18 or F22 and opting for slightly longer exposures. Position your camera in the direction of the storm and, if possible, aim to capture cloud-to-ground lightning strikes emerging from the storm structure. Use continuous shooting mode with a shutter release or shoot a time-lapse sequence to increase your chances of capturing lightning bolts.
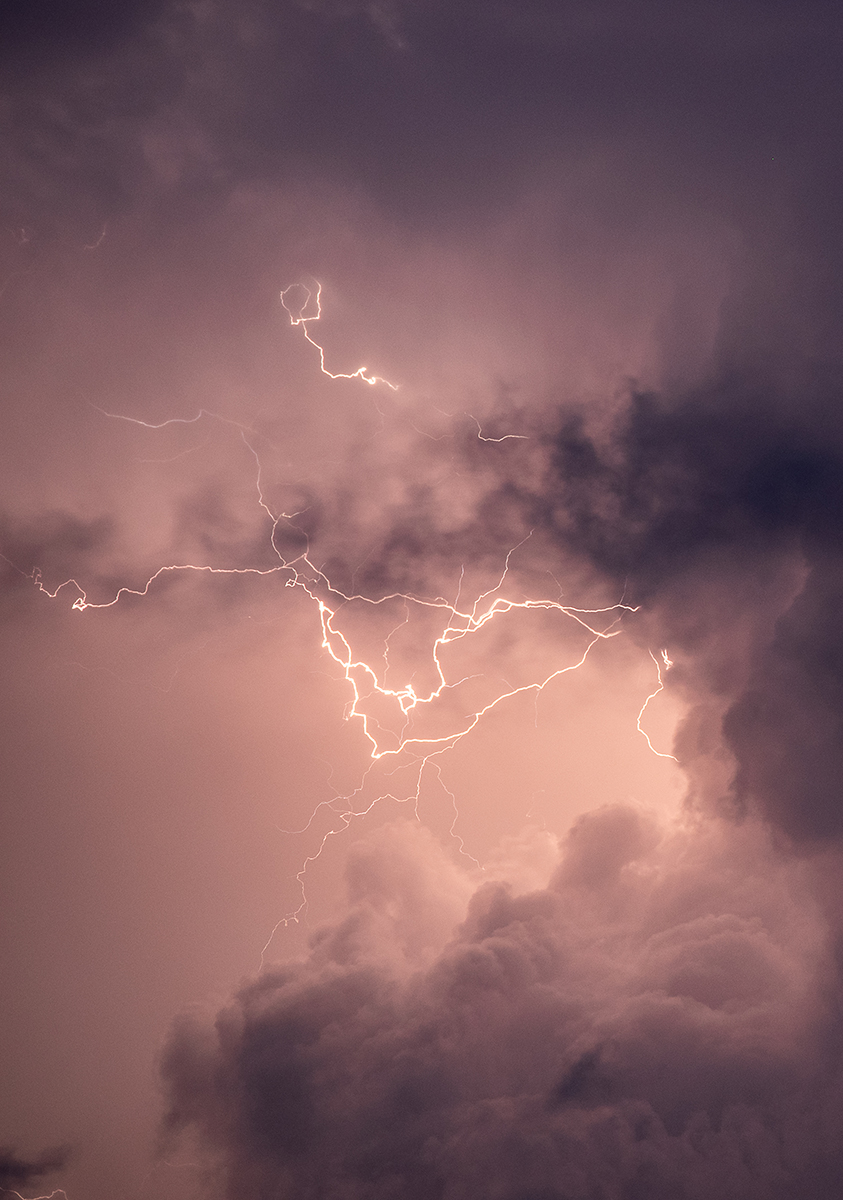
70-200mm (200mm), F5, 13 sec., ISO 800
Click image to view larger
Make safety a priority.
Always have a chase partner with you—someone who can help with navigation and identify escape routes in case the storm shifts or expands unexpectedly. Study local road networks and make sure you have reliable cellphone service; using a mobile hot spot or signal-boosting antenna can improve communications. For those moments when technology fails (because it does), download offline maps on Google Maps to ensure you can navigate even without internet connectivity. Above all, with storm photography, remember that Mother Nature is unpredictable and formidable, so always maintain a safe distance from the storm, even if you're confident in your abilities, as weather conditions can change rapidly.
To see more of Travis Nickey’s work, check out his Instagram, as well as his YouTube and TikTok for storm-chasing videos.
Is your Tamron News subscription up to date? Click to subscribe to all editions of Tamron News featuring how-to tips, new product news, contest announcements and inspiration!
More Photo Tips | Watch Videos | Learn More About Tamron Lenses | Photo Gallery