Bird Photography: Mr. Bluebird on His Shoulder
Or on a branch nearby in David Akoubian’s backyard sanctuary, where he photographs feathered friends with his Tamron 150-500mm VC ultra-telephoto lens.
Share the article:
More photo tips | Video Gallery | Photo Gallery | Enewsletter Sign-up
By Jenn Gidman
Images by David Akoubian
Growing up in a rural neighborhood east of Atlanta, David Akoubian appreciated birds from an early age. “My mom loved birds, and we had birdhouses and bird feeders all over the place,” the Georgia photographer says. “I soon loved the birds, too—especially the bluebirds, which really spurred my interest in birds and bird photography. Today, I’ve created a sanctuary in my own backyard, with houses for the bluebirds built of wood from torn-down sheds at a local equine therapy center where my wife and I volunteer.”
For his blue bird photography, David uses the Tamron 150-500mm Di III VC VXD ultra-telephoto lens on his mirrorless camera system. “The 150-500mm lens is so fast and accurate in its focusing,” he says. “I’ve never had a lens this good in that capacity. My images are very sharp, and the lens is so compact for having the reach it does—and that reach is important when I don’t want to spook my subjects. Plus, I’ve taken the lens to Alaska, where boat excursions are on the itinerary and you can’t use a tripod. That’s when the Vibration Compensation (VC) feature comes in especially handy to help me keep my photos shake-free.”
From his perch on his porch, David photographs a wide variety of chirpers, including tufted titmouses, Carolina chickadees, white-breasted nuthatches, downy and red-bellied woodpeckers, and, of course, bluebirds. “Taking pictures of them clears my mind,” he says. “It’s so relaxing to sit with a cup of coffee, listen, learn, and capture wonderful photos in the process.’
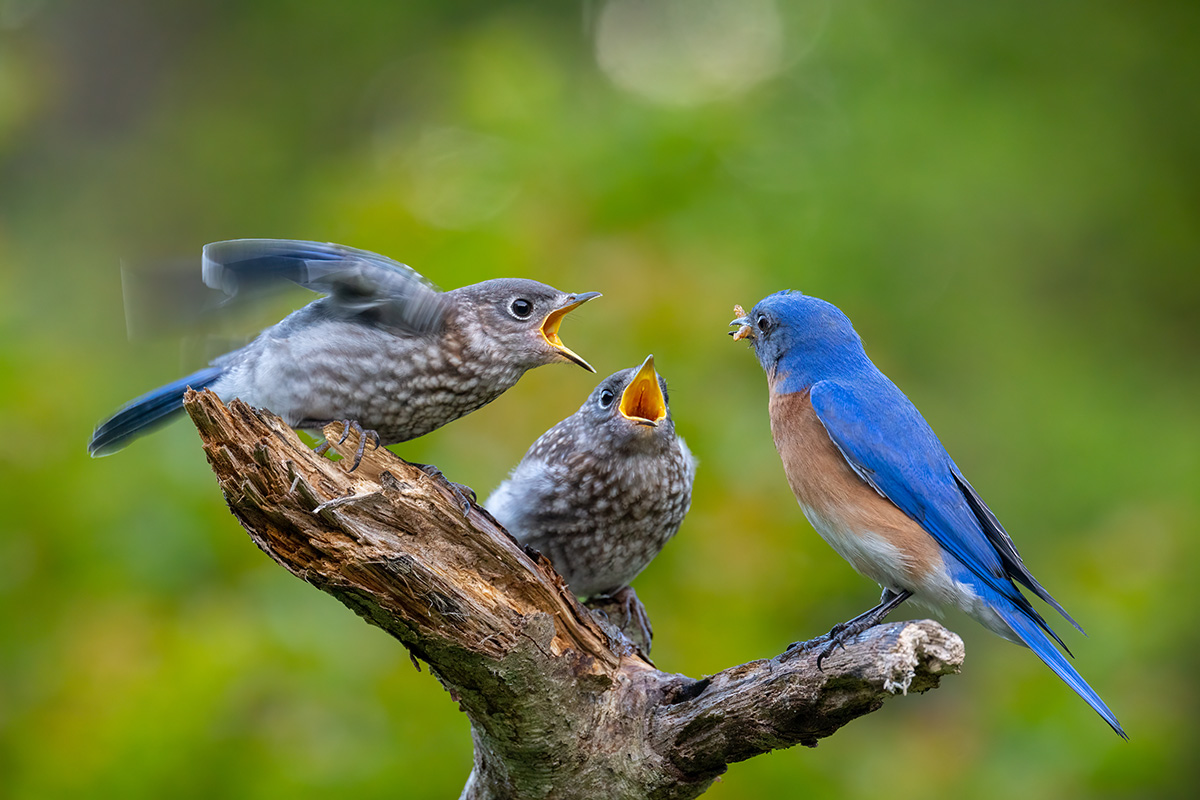
150-500mm (500mm), F8, 1/125 sec., ISO 800
Click image to view larger
DAVID’S QUICK TIPS FOR BLUE BIRD PHOTOGRAPHY
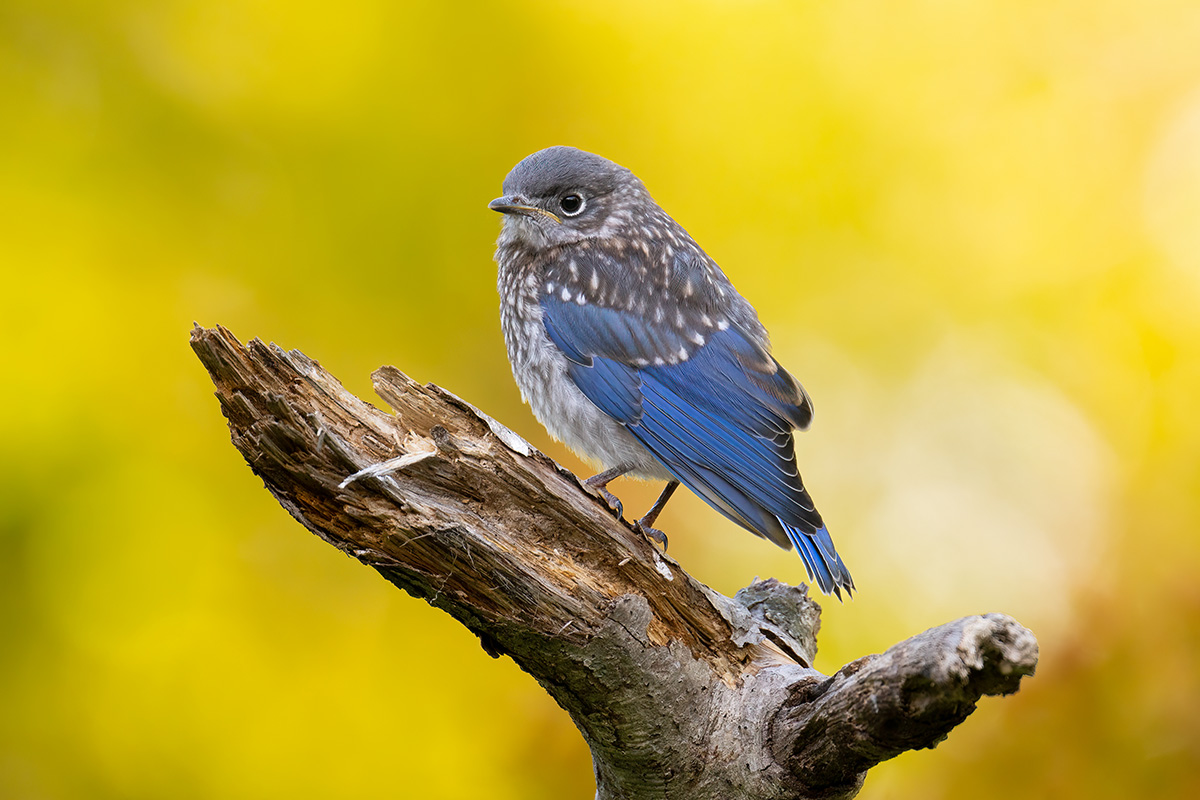
Create a backyard oasis.
You don’t have to leave your home to capture stunning bird photos, and setting up your yard to attract birds doesn't have to be complicated. Start by providing them with a reason to visit. Hang a feeder on a shepherd's hook or any suitable structure, and a few feet away, erect a post or stick where birds can perch while waiting for their turn at the feeder. This "pecking order" creates opportunities for interesting interactions and behaviors.
150-500mm (500mm), F8, 1/250 sec., ISO 1000
Click image to view larger
Don’t chase—anticipate.
For faster-moving birds like hummingbirds, or even for insects like dragonflies that turn up, you can run around the yard trying to capture them. But I’ve found they often return to the same spots over and over for blue bird photography. Hummingbirds, for instance, tend to circle back to the same flowers every five to 10 minutes to feed. Learn each species’ habits, be patient, and you’ll be rewarded. I’ve learned so much just sitting on my porch watching, and my photos have evolved for the better because of it.
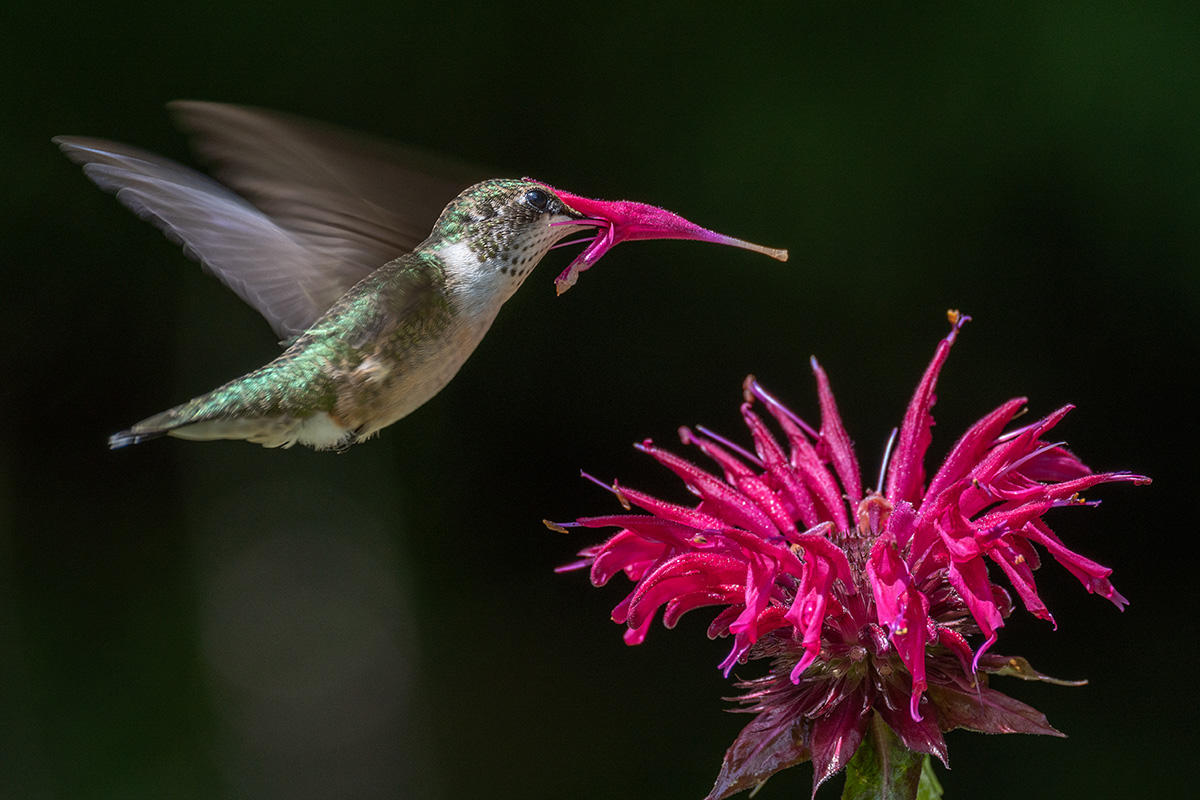
150-500mm (500mm), F8, 1/250 sec., ISO 200
Click image to view larger
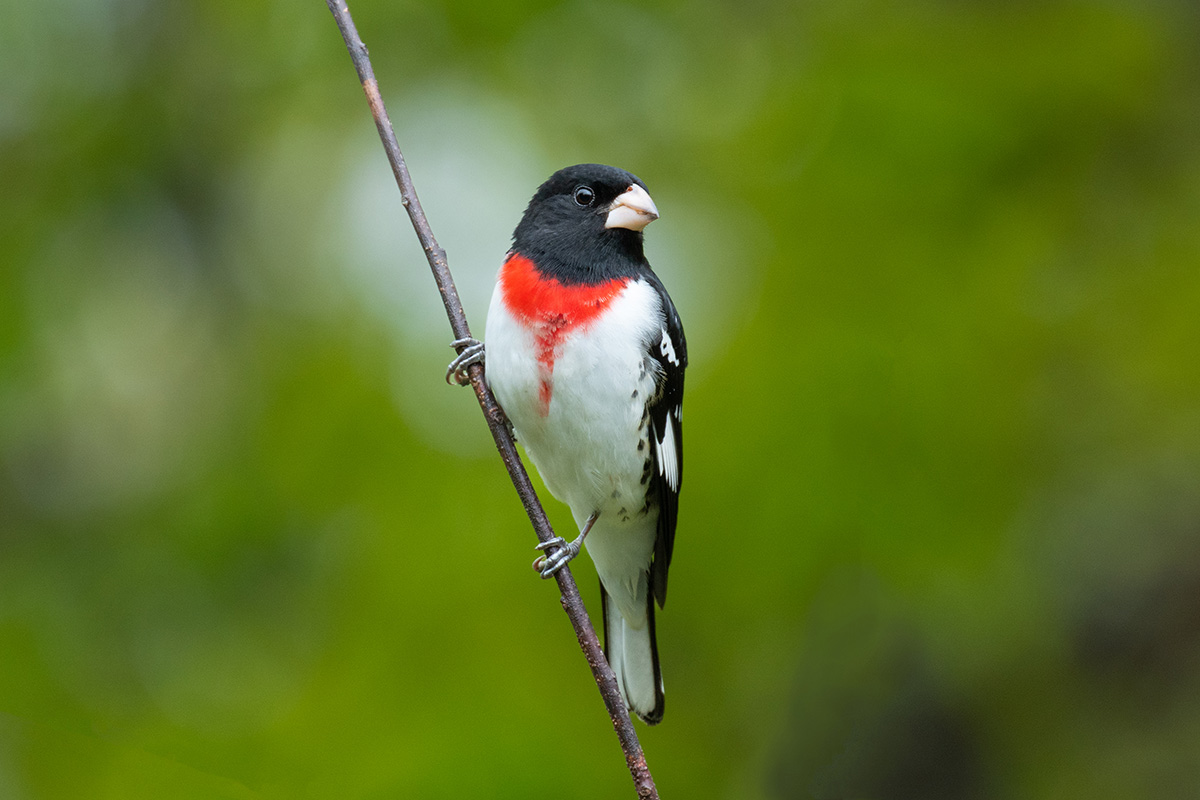
When starting out, don’t photograph too many songbirds in flight.
It can be frustrating at the beginning, because those birds are so small and hard to capture well. Instead, start with the low-hanging fruit of birds perched on posts or branches. They’ll provide a more satisfying experience as you learn to frame and capture them.
150-500mm (500mm), F8, 1/500 sec., ISO 1600
Click image to view larger
Also, trust in your camera's capabilities. Birds often fly quickly from light to shadow and then back again. I’ll typically shoot at around 1/125th to 1/250 of a second and an aperture of F8 to achieve a balanced depth-of-field, then set my camera to auto ISO to adapt to those varying lighting conditions. Keeping it simple makes the photographic experience much more enjoyable.
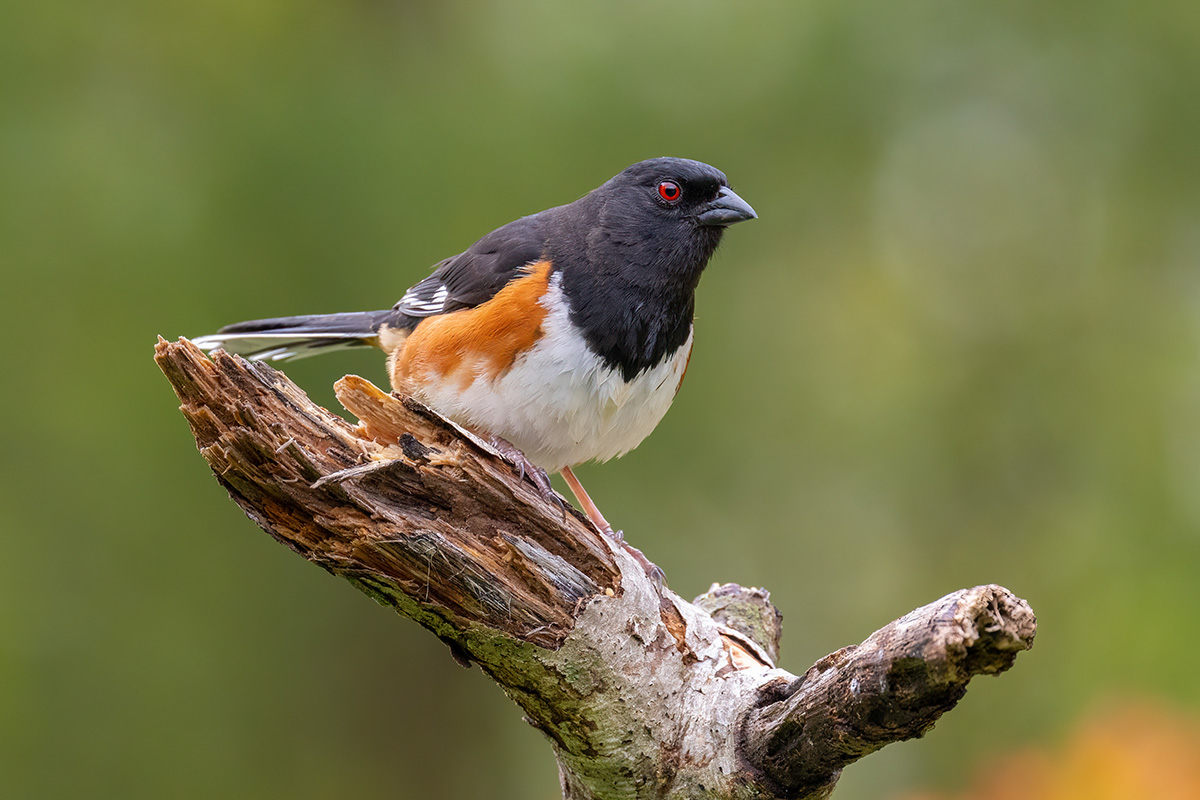
Don’t always focus on stopping movement.
Many people use faster shutter speeds or a flash for bird photography to freeze motion. I used to use a flash years ago, but it doesn’t look as natural to me to see a bird in the air with its wings stopped. It’s like seeing a helicopter with its propeller blades frozen, as if it might fall out of the sky. Instead, I’ll find a well-lit area and use slower shutter speeds for bird photography, which creates a bit of blurred motion in the bird’s wings and emphasizes the bird’s movement.
150-500mm (428mm), F8, 1/125 sec., ISO 2500
Click image to view larger
Consider the distance between your subject and the background.
Where I sit on my porch is about 8 to 10 feet away from the posts I’ve erected, which is ideally where the birds will land. Sometimes, though, the birds, like the cerulean warbler you see here, will hang out in the branches that are about 6 to 8 feet behind those posts. Beyond that, it’s about 40 feet back to the next set of trees. The compression you get using a long focal length like 500mm at a close distance like this will give you a fairly shallow depth-of-field. I’ll typically shoot at around F8 because I want to ensure the bird’s face stays in focus while the rest of the image beyond that beautifully falls off..
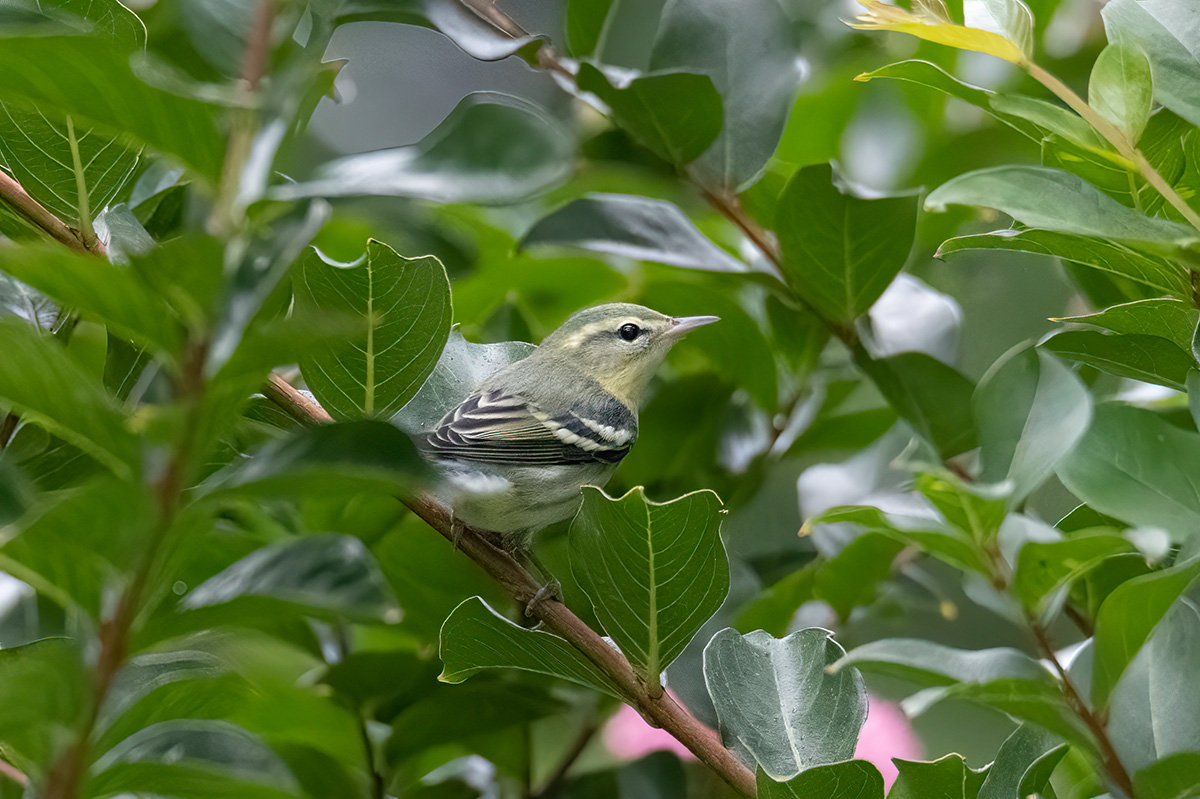
150-600mm (600mm), F8, 1/125 sec., ISO 9000
Click image to view larger
To see more of David Akoubian’s work, check out his Instagram or go to www.bearwoodsphotography.com
Is your Tamron News subscription up to date? Click to subscribe to all editions of Tamron News with helpful tips, new product news, announcements contests and inspiration!
More photo tips | Watch Videos | Learn more about Tamron lenses | Photo Gallery