Techniques from the Techs
The Art of Focus Stacking
by Jillian Bell
More Photo Tips | Video Gallery | Photo Gallery | Enewsletter sign-up


Photographers tackle the nuance of depth of field all the time in macro photography. I often get asked, “Do you use focus stacking to help give dimension to an image?” I do… but not often. If we take a look at focus stacking in its simplest form, the reasons I choose to do so breaks down into 2 reasons.
Purpose or Inspiration.
“Purpose” is a bit utilitarian but becomes a useful tool when situational elements hinder photographic conditions. Here’s an example:
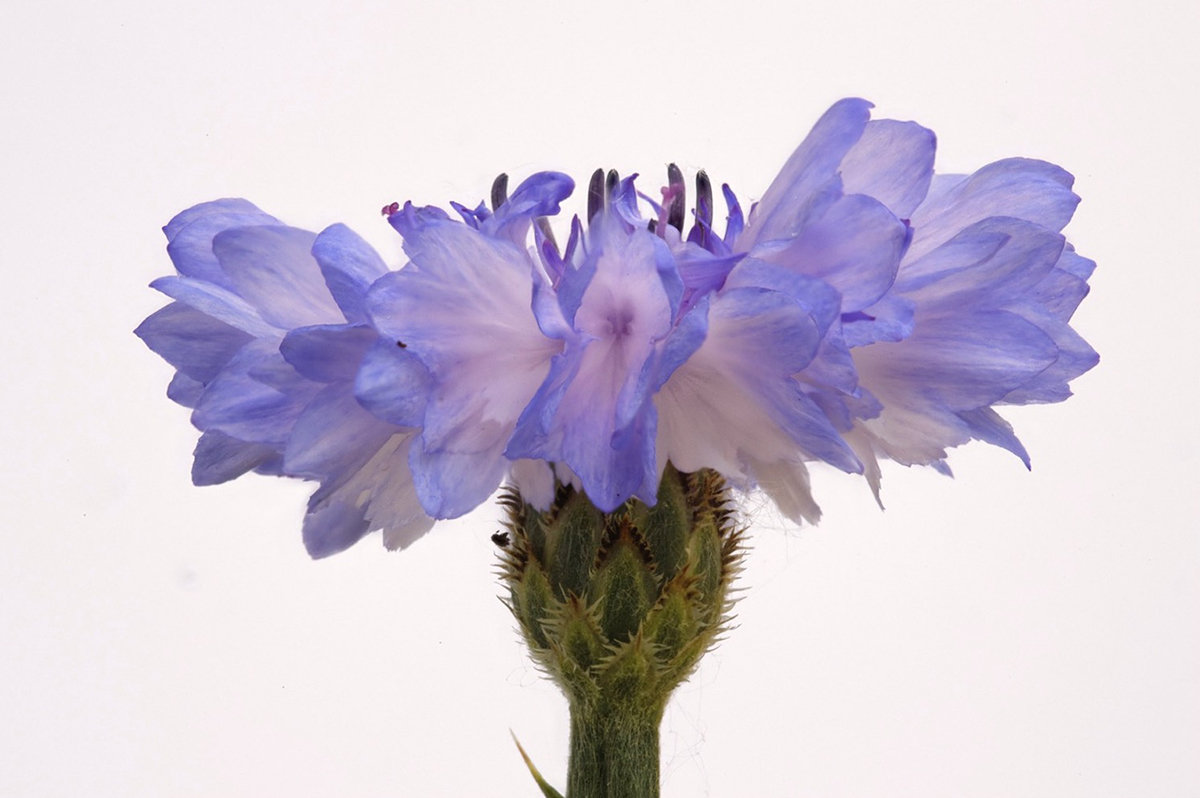
F/4 1/500sec ISO6400 (x8)
Click image to view larger
I was out in my garden taking photos of flowers. Dropping in this crisp, white background gave the image a more commercial look. Using my SP 90mm F/2.8 Di VC USD Macro 1:1, I needed a hefty depth of field to fully wrap around the flower. The problem was, even with great midday light, at F/32 my shutter speed was too slow. The flower blew around just enough to affect its overall sharpness. I clamped it down… I blocked the breeze… It didn’t help.
Focus stacking was the solution in this case! I stacked 8 images at F/8 to achieve a faster shutter speed. Using manual focus, I started at the front and with each image, shifted my focus point slightly further back. Other added benefits to stacking in this case is an added overall clarity and image sharpness.
Take a look at the closeup below; notice the slight pixel diffraction? Even at ISO 100, a smaller aperture and faster shutter speed was needed to achieve the best clarity for this image.

Click image to view larger
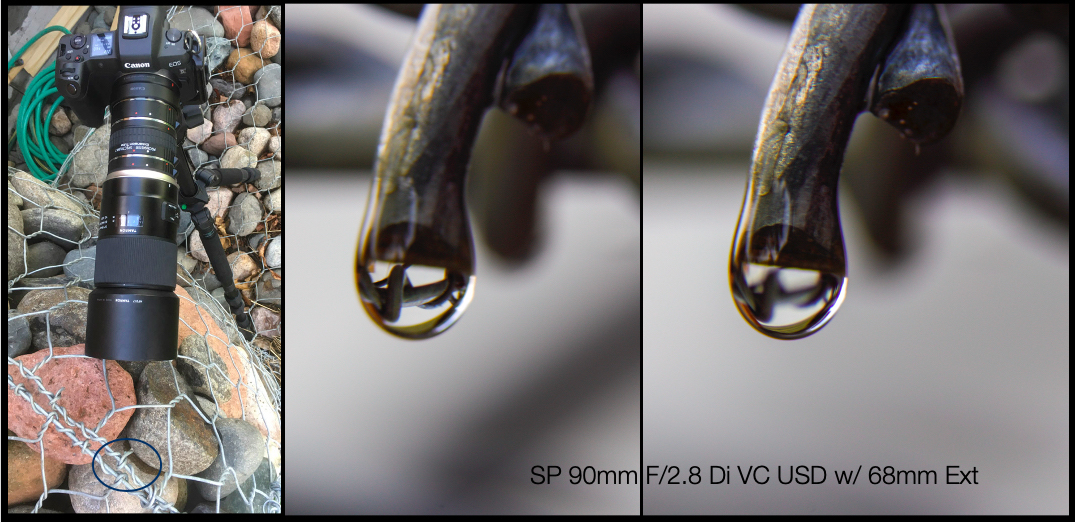
In contrast, “Inspiration” starts with an artistic concept. In many of my photographs, I blend together shallow, non-distracting backgrounds with sharp subject detail. I cannot achieve this look by simply closing down the aperture. I like using shallow depth of field in my macro imagery to isolate subjects and decrease distractions. This first image is a simple two-image stack. One focusing on the wire barb; the other, focusing on the water droplet reflection. The morning dew is never an issue with Tamron’s moisture resistant construction.

F/2.8 1/20sec ISO400 (x2)
Click image to view larger
Click image to view larger
Here’s another fun example. By isolating only the subjects in this little scene, I created a more realistic, life-sized appearance. Unsuspecting campers are about to get a surprise visitor to their campsite! Each photograph used in the stack focused on a different character in the scene. Taken at F/2.8 with my Tamron 35mm F/2.8 Di III M1:2, the close focusing capabilities were amazing! I chose this wider-angled focal length to aid in “real-life” perspective. The 35mm angle of view is a bit more environmental then the 90mm.

) F/2.8 1/4sec ISO125 (x4)
Click image to view larger
Helpful Tips: When creating your focus stacked photographs, use a tripod. Lining up each frame exactly is critical. Turn off any image stabilization. Use Manual Focus. Lastly, find a software that makes sense to you. There are many options. Photoshop, and now Lightroom has these capabilities. Helicon Focus, Affinity Focus, www.focusstacker.com are just a few others. The main idea is… have fun with it!
More Photo Tips | Watch Videos | Learn More About Tamron Lenses | Photo Gallery