- .
-

Making a Light Table
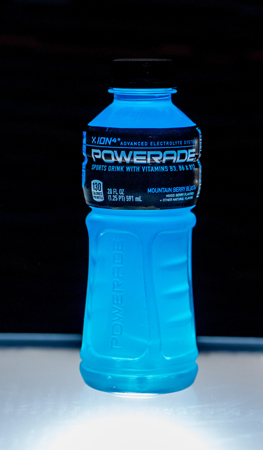
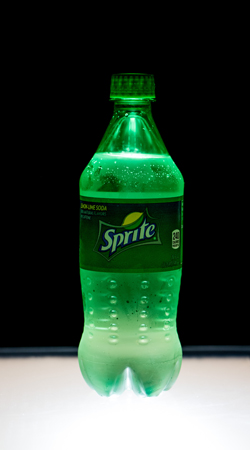
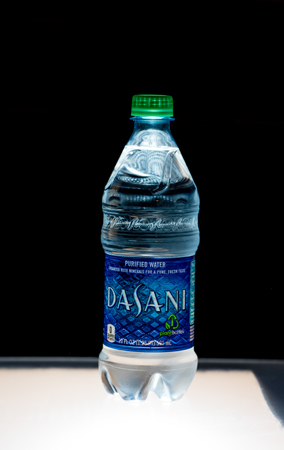
Depending on where you are in this country; good morning, good afternoon, or good evening! For this month’s DIY project, I bring you something a bit different that wasn’t much of a plan. As a technical representative for Tamron, I do a decent amount of travel and there are times where flight schedules give me some extra down time at my hotel. For this project, I just happened to be in Boulder, CO for a TMLC event. I had some time to kill before I had to pick up my co-worker from the airport so I decided to take advantage for some creative photography. So I took the TMLC van to the store and did a bit of shopping. With just a few supplies, I was able to get some real cool lighting effects using this technique of lighting from underneath. -
For this shoot, you will need the following:
-
Cardboard box
-
Duct tape
-
Box cutter
-
Glass or acrylic sheet
-
Some sort of LED light for your subject
-
For the cardboard box, I bought a simple medium sized shipping box. This will vary depending on what type of light you need to fit inside. Tape the box together and cut a rectangle on the top end and on one of the sides. Take the excess piece of cardboard from the side section and tape it back to the box to make for a door. This will allow you to take in and out your light source.
The glass or acrylic sheet will be what you put your subject on top of so the light shines through. I had a difficult time finding a glass sheet, but I was able to easily find some acrylic at a local hardware store. This worked just fine. It was here that I did a bit of a change to my setup. Normally, you would cut your acrylic sheet to fit and tape to the size of your box. To cut costs, I chose to just place my acrylic sheet right on top. It allowed me to be a bit more portable with the setup. You may want to be a bit more precise at this step as it does cut down that amount of composition in your final image.
From there it’s just a matter of using whatever type of lighting you have. Just make sure it is some sort of LED light to keep things pure white. Maybe you still have that table lamp from my DIY lightbox tutorial.
So far this was one of the easiest setups I have done and the most fun. Under expose the image and just see what the light from underneath can do. No matter where you are whether it be in the comfort of your home or on the road in Colorado, get out and shoot to keep that inspiration going. Happy shooting everyone!
-