- .
-

Making a Glitter Light Modifier
Hello again everyone! It is a new year and Tamron and myself will be continuing our great Build and Shoot articles for more at home projects for you to enjoy every month. Today we will be making a light modifier using some glitter. What the glitter does is one, gives you reflection, but also adds some nice interest to the backdrop. The textures that you can get from it are very unique from what I’ve seen in light modification. -
The materials we need are very simple:
-
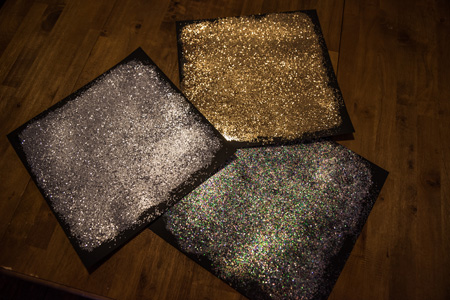
Glitter – Your choice of color. I decided to use a gold and two kinds of silver
-
Glue stick
-
Black paper board
So the build is very simple, the shoot…not so much. In order to make the reflector, we just use a good amount of the glue stick on a piece of black paper board. Make sure to have a couple extra pieces of paper board to use as the background. From there just pour on enough glitter to cover the surface area and either use a roller or your hands to press it on firmly. Although it’s a bit messy, I found that using my hands was easier than trying to roll it on. Repeat these steps for the other colors you want to use and you’re done with the build. Now it’s time to shoot!
Now like I said earlier, the shooting part can be a bit tricky. The reason I say that is because there are a lot of moving parts, at least there was for me. First I had to set the piece of black paper board for the background and one piece for my subject to sit on. Next I had to figure out the right angle to set the reflectors so I wasn’t putting out too much light onto the subject and just mainly to the backdrop. One important thing to consider, you will need some sort of light source to bounce off of the reflector. I used my Surefire LED flashlight. This light emits a true white and doesn’t mess up any of my white balance.
From there it’s just a matter of working the angles. Like I said, you do not want too much light bouncing onto your subject. You will find that you need to over expose your settings a bit to get the effect you are looking for. So by having too much light emitted onto the subject, it could easily blow out the highlights.
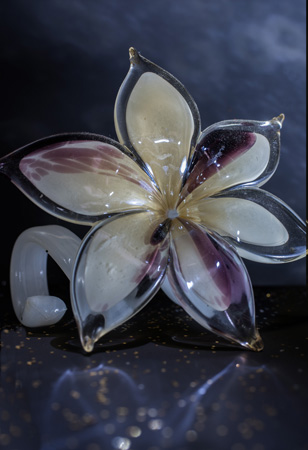
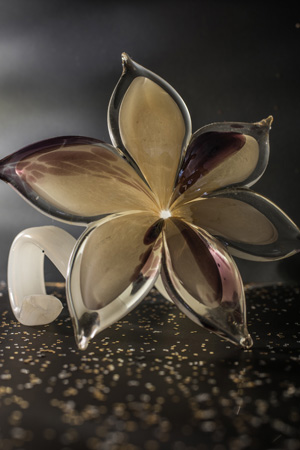
For the final images that I have below, I used my Tamron SP 45mm f/1.8 VC USD. The close focusing made it possible to get a nice tight shot of my subject and get great depth of field that can be seen in the foreground.
So there you have it. Things can get a bit frustrating in this type of photography, especially with using reflectors and flashlights. Just remember, have fun with it…happy shooting everyone!
-