-

Making a Speedlight Diffuser
Hello everyone, Pat Nagle here for another do it yourself project that may possibly be my favorite so far. Now I have been doing these DIY projects monthly for a little over a year, so you can imagine all the random pieces of equipment I have lying around. Lots of plywood, pipes, boxes, and endless amounts of tape. I have had fun shooting with what I’ve made, but haven’t had much daily use out of the gear. Not that the past projects I’ve done don’t work. It’s just what I shoot and being that event photography is my main forte, portability and accessibility is what I’m looking for.
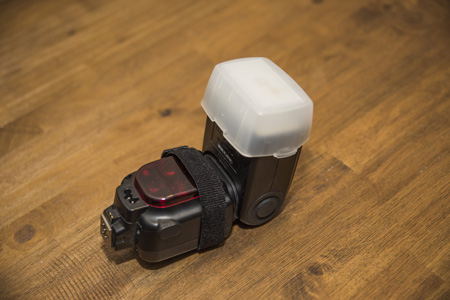
That being said, I bring you the DIY Speedlight diffuser. Now I know what you’re thinking, “but I already have a diffuser that came with it”. That’s true, most Speedlights will come with one. However, they can be limited in just how soft that light can be. Those diffusers, like the one that is in the first image below, still have limiting uses. If you’re unable to bounce the light, the flash still needs to be pointed directly at the subject making the light not as soft as we’d like. To fix that, we can incorporate a larger diffuser that is based on shooting up and into the diffuser that spreads the light up, out and around, lighting up the entire room like a light bulb. The effect? Softer, more flattering images.
These diffusers work great, but a legitimate one can cost over $100. I am going to show you how to make one for just $5. Here’s what you’ll need.
• Clear drawer mat
• Tape
Yes you read that correctly, just two things needed to enhance your portraits tenfold! Our main ingredient here is the drawer mat. What you want to look for are the ones that are clear or translucent. That is what gives us the effect that these expensive diffusers are doing. Allowing light through but softening it in a way that makes images look professional. I found mine at Wal-Mart in the kitchen/dining section.
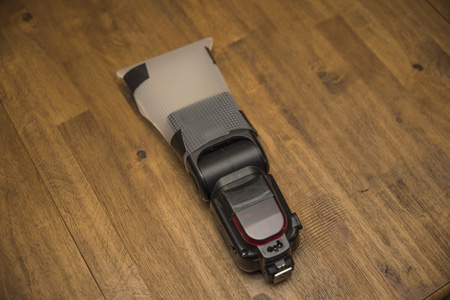
Once you have the drawer mat and tape, it’s time to make some cuts. With a pair of scissors, cut the mat so when you fold it over your flash, it overlaps itself. From there I took 4 pieces of electrical tape and sealed it all together. You want to make sure that you have no openings showing so no light can leak out. I also left it just a tad loose at the bottom so I’d be able to slip the diffuser off and on. Below is an image of the final product.
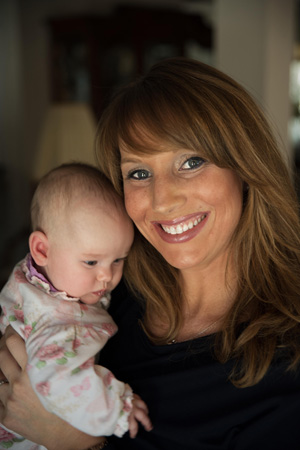
And that’s it, now time to test it out. I got to meet my niece for the first time and shot the portrait below of her being held by my sister. Shot with the Tamron SP 24-70 f/2.8 Di VC USD and the results were beautiful. A nice soft light that adds a real natural feel to it. Like I said earlier, this is probably my favorite DIY that I’ve done so far. Not just for the cost, but for the convenience. I can slip this on and off with no issue. And it takes up no room in my bag. It actually can add a second purpose as some protection for another body or extra lens. This diffuser is a real winner!
Happy shooting everyone!