Here are the materials that we will be needing:
1/2” threaded galvanized piping
o 3 x 24” lengths
o 2 x 90-degree elbows
o 2 x end flanges
• 1 x ¼” bolt, 2” length
• Several ¼” washers
• Steel mending plate
• Small rectangle of hardwood slightly bigger than plate
• #10 bolts and nuts and washers, 2” length
• 2 x 24” lengths of 2 x 4” lumber
• 8 x 1 ½” wood screws
• Electric drill and drill bits
• Velcro strips
First, we need to create a base plate that attaches to the threaded tripod hole and support the camera. Attach the mending plate to the larger rectangle of hardwood with the included screws. Then, drill a ¼” hole through the center of both pieces, using a slower speed when drilling through the metal. Next, drill two 3/16th holes on either side of the center hole. Drill two matching holes in the center of one of the 24” pipe pieces, then attach the plate to the pipe with #10 bolts, nuts, and washers. Then, using the ¼” hole in the plate as a guide, drill a ¼” hole through the pipe.
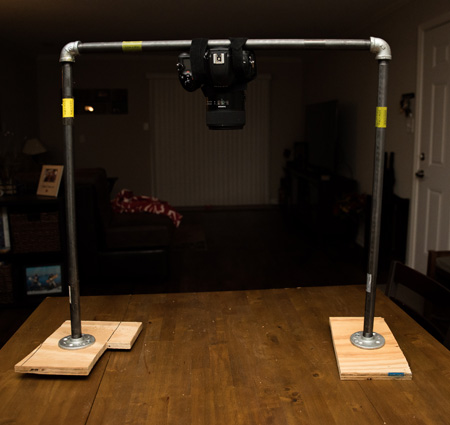
Attach the 90-degree elbows to the pipe with the bracket, and then screw on a pipe to each end. Arrange the pipes so you have a flat u-shape, with the sides perpendicular to the top bar, and the support plate faces outward. Twist the flanges onto the ends, and place them onto the 2 x 4s, about 9 inches from the back. Attach the flanges to the wood with 1 ½” screws. Attach the camera, and then cut two strips of Velcro and wrap them around the camera to support the weight. Stay clear of any controls.
And that’s all there is to it. From there you have the option to shoot from a bird’s eye view. This can be very helpful when shooting product or macro photography. You can even clamp some lights to the side bars for some quality lighting. Hope you all enjoy, happy shooting!