Common Questions
High Key at White Sands National Monument
More Photo Tips | Video Gallery | Photo Gallery | Enewsletter sign-up
This story takes place in White Sands, NM. It has been on my list of places to visit and it did not disappoint. 3 hours south of Albuquerque, just east of Las Cruces lies White Sands. The National Monument is further east of town just off route 70. To enter the park, the feeling is just like any other. There’s a visitor’s center, entry gates and maps to help guide you through their region. What makes this place unique, is the unexpected rolling white hills, expanding 275 square miles (approx.). It is common for people to rent sleds and bring snowboards or simply have a family picnic in the afternoon sun.
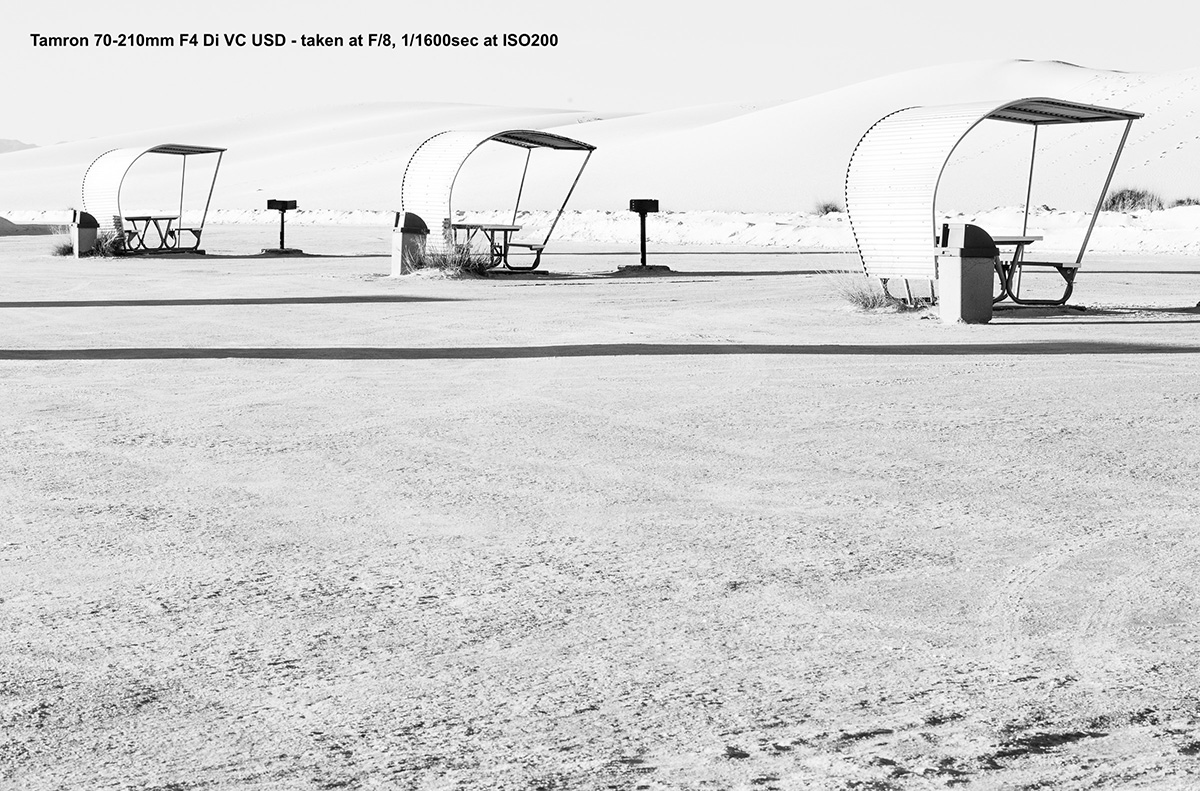
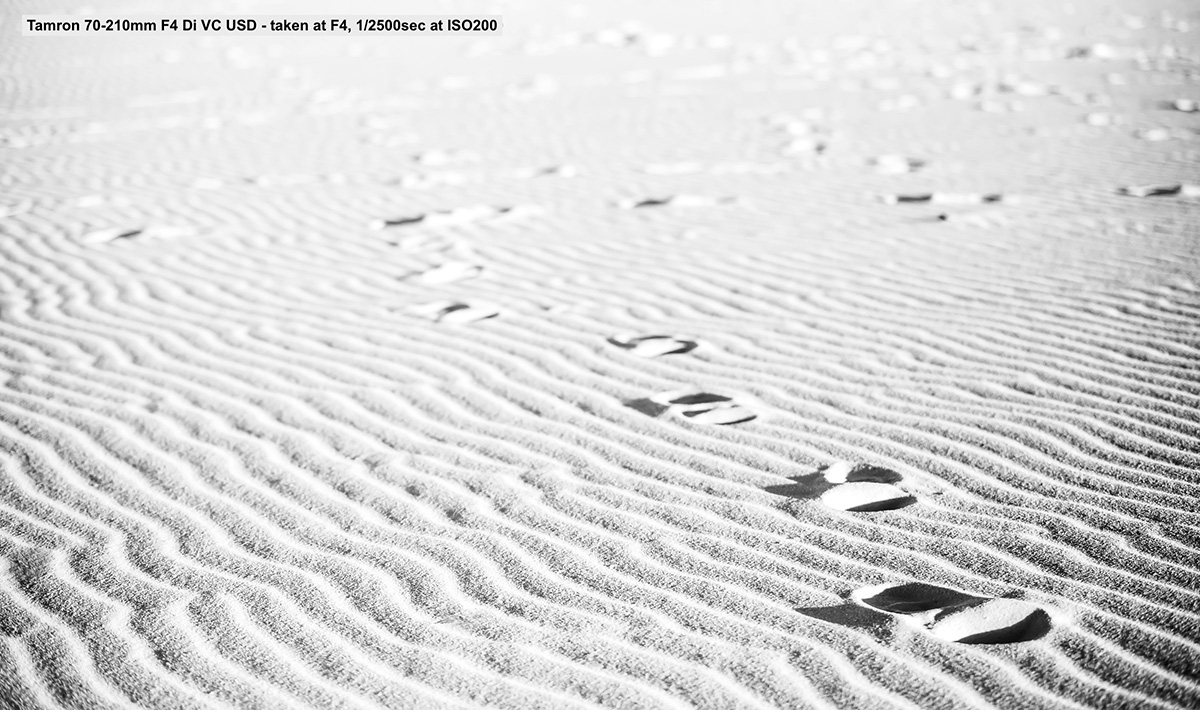
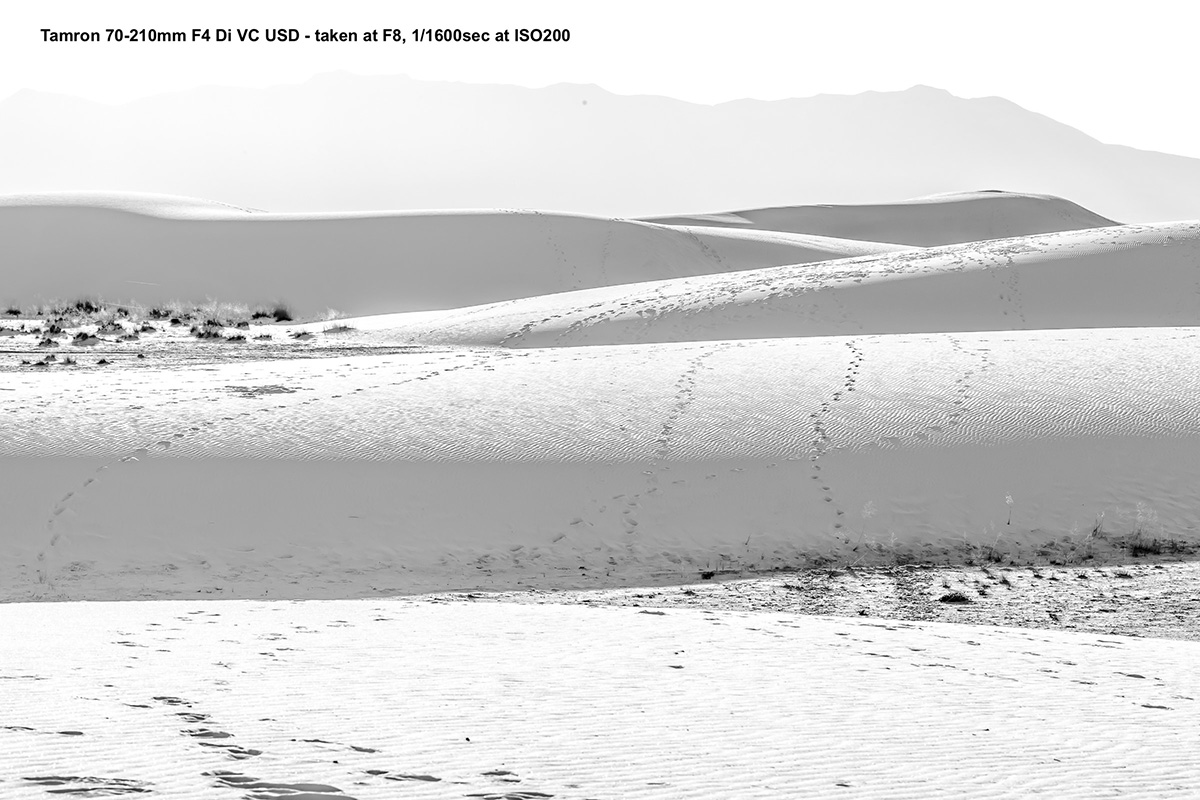
My goal was to experiment with High-Key Photography (explained below) and found inspiration in this stark white backdrop. Experimenting just before sunset, I tried to elongate shadows while keeping a minimalistic, high-contrast look. The lens of choice was the Tamron SP 70-210mm F4 VC USD (Model A034). Because of its lightweight portability and sharp image quality, it has quickly become a favorite of mine. The range easily flattens rolling hills into stripes of tone. I knew the end images were going to be B&W, so to help prepare for post-production, I shot in RAW + Small Jpg with a color profile of B&W. I was then able to doublecheck my histogram with a B&W preview image in playback.
It’s a wonderful but dangerous place to wander. Time seems to slow down, and you quickly lose track of it. There is a recommended loop route with plenty of parking available. I thoroughly enjoyed the sheltered picnic tables! Very vintage and valuable in providing shade. At almost any point it is possible to walk up into the hills. However, it is imperative to keep your bearings. I was amazed how quickly you can also lose all sense of direction as sightlines to the parking lot sits just below the horizon. The other two images I chose to include tries to showcase a small essence of the vast landscape. Footprints come and go with the changing winds. Layering white sands expand into the distant horizon line. All edited into black and white adjusting mid-tones and shadows to keep in-line with high-key styling.
Click image to view larger
Click image to view larger
Click image to view larger
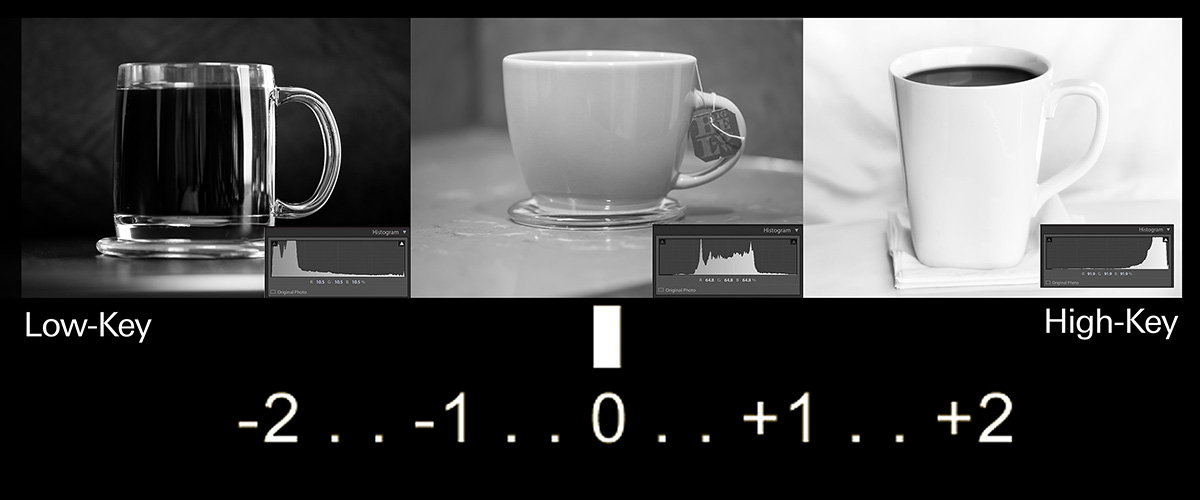
An explanation of High-Key, Neutral, and Low-Key Photography.
Click image to view larger
By definition, high-key photography involves photography where there is a large amount of light tones and fewer mid-tones or shadows. Stylistically, some say it looks overexposed, but it is not. I find it to be crisp and clean. Images include deep dark tones minimally and mid-tones are often unseen all together. This subtle contrast is key. Look at the histogram of the image on the right. Do you see how the represented values are also on the right-hand side? If these values tip over the right-hand side the image is over-exposed.
Very rarely do we achieve a completely neutral image. We expect a properly exposed image to look like the middle histogram. I’ve had this conversation many times. With all tones within the midrange, it is ideal for editing, but not visually appealing. You need the black and white tones to give a neutral image the contrast it needs.
Lastly, look at the image on the left. Low-key photography is similar to high-key but reversed. There is a large number of dark tones and few mid-tones and highlights. Notice how all the represented values are on the left-hand side. If these values tip over the left, your image is under-exposed. This technique is often found within theatrical portraits or photographs at night.