Travel Tales from The Hub
National Parks

By Ken Hubbard
Photographing Straight On Til Morning
For me, life on Long Island is filled with bright lights from houses, cars & malls, so seeing and photographing the night sky and the Milky Way at its fullest is a very difficult feat to achieve. Back in 2015 National Park Trips Media (www.nationalparktrips.com) approached Tamron about conducting night workshops in the national parks, I will have to admit I was pretty excited about the possibilities! In 2016 we ended up doing 8 workshops all across the country from Acadia National Park in Maine to Zion National Park in Utah. At each park we guided our participants through the night, from sunset and the blue hour, chasing the Milky Way through the night and then finally capturing the sun as it once again rose above the horizon. It made for a night with little sleep but capturing amazingly beautiful images made it all worth it. In 2017, we are continuing our workshops at 6 more National Parks: Canyonlands, Zion, Grand Teton, Great Sand Dunes, Yosemite and Saguaro National Parks.
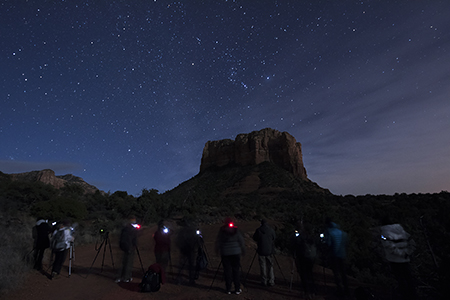
Image Captured with Tamron’s SP15-30mm Di VC USD (17mm, 30 Sec,, F/5 @ ISO 3200)
Time of Year
One of the key elements to these workshops is helping our participants capture breathtaking images of the Milky Way and its galactic center. Since the brightest and most colorful part (galactic Center) of the Milky Way can only be seen well for about half the year, picking the correct time of year is of the utmost importance. In the winter months, you can see faint remnants of the Milky Way but the galactic centers rise above the horizon coincides with sunrise, causing it not to be seen. By spring, the center of the galaxy can be seen in the early morning hours around 4:00am, giving a short window of time to capture it before the soon to be rising sun starts to brighten up the sky, washing it away. As the months go by, the center rises earlier and earlier, making the summer months (June – August) the easiest time of year to capture the brightest and fullest Milky Way images. Amazing images can still be captured during the fall months; you just need to be out a little earlier in the night (10:00pm) and not too late in the year. Since the ambient light of the sun is still present hours after sunset, your exposures trying to capture the Milky way may still be effected. You will once again have a shorter window of time to capture the center. The moon phase plays a large factor as well, since it’s reflected light works in a similar fashion as city light, casting off bright light and reducing the amount of visible stars. Plan ahead and look for a new moon (no moon) date or try to be out before the moon rises above or sets below the horizon.
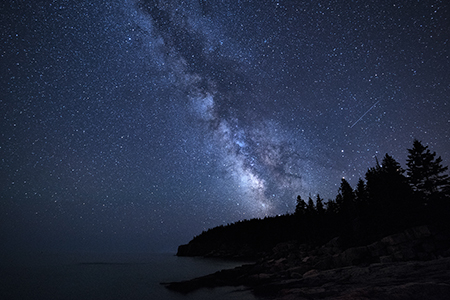
Image Captured in August with Tamron’s SP15-30mm Di VC USD (15mm, 30 Sec,, F/2.8 @ ISO 1600)
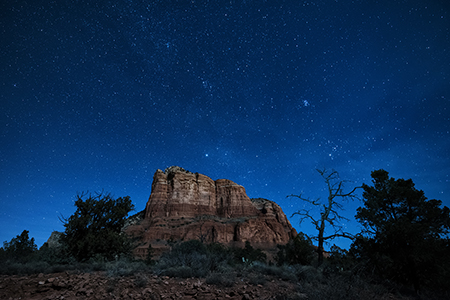
Image Captured in December with a partial moon
Tamron’s SP15-30mm Di VC USD (15mm, 20 Sec,, F/2.8 @ ISO 2000)
Picking a Dark Sky Location
Once you pick the time of year you are going to capture night sky images, the next step is choosing a dark sky location. Big cities and bright lights are not the only culprits washing away the star lit skies. Your local town most likely gives off enough light to prevent you from seeing a sparkling night sky with a pronounced milky way streaking through it. Unless you are fortunate to live in a town like Borrego Springs California, which is an international Dark Sky Community, you will most likely need to drive a few miles away from home to appreciate what the night sky has to offer. There are many websites dedicated to finding these places, (http://www.observingsites.com, http://darksky.org/idsp/finder/), so try to get as far away as you can for the best views.
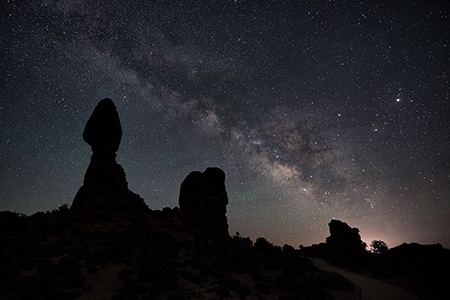
Image captured in Arches NP with Town of Moab, UT lighting up Background
Tamron’s SP15-30mm Di VC USD (15mm, 20 Sec,, F/2.8 @ ISO 3200)
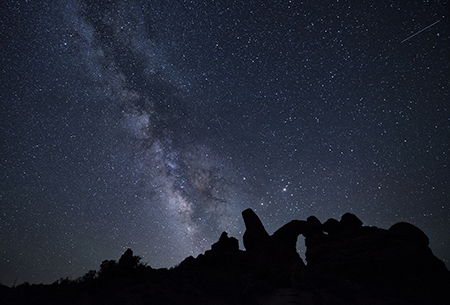
Image captured in Arches NP turning away from Moab, UT
Tamron’s SP15-30mm Di VC USD (15mm, 20 Sec,, F/2.8 @ ISO 3200)
Now that you have made your way far from those bothersome lights, it’s time to concentrate on what’s around you to help create a more interesting image. For our workshops, we are lucky to be in National Parks that provide us with many interesting foreground elements like trees, lakes, mountains and rock formation. Don’t be disappointed if you are not near one of our National Parks, there are great locations everywhere. Look at local and state parks as well, many have all the same types of features. Just make sure you check opening and closing times and look into any permits you may need to be in the parks after dark.
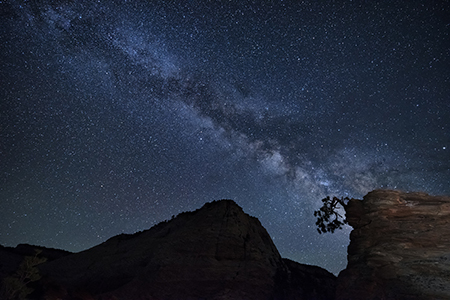
Image captured Zion NP using Tamron’s SP15-30mm Di VC USD (15mm, 20 Sec,, F/2.8 @ ISO 3200)
The Importance of Equipment
You will need a few good pieces of equipment to help reduce the frustration facture and capture the night sky with sharp pinpoint stars. First and foremost you want to prevent any type of vibrations and camera shake, and a good sturdy tripod and shutter release device will do just that. The one thing I see more often than not is an attendee using a tripod that is too small and too light for the camera and lenses they are using which is frustrating for the user and has a detrimental effect on their images. If you don’t have to touch your camera to release the shutter, you shouldn’t. Releasing the shutter by pressing on the shutter release button may not seem like you are creating any shake, but you are. A shutter release cable or remote will fire the camera without any movement to the camera body. If you do not have a device to fire the shutter, try using the self-timer in camera. Set the timer to 2 seconds, press the shutter release, then hands off the camera and you will get the sharp images you are looking for. Lastly, since we are looking to capture as much of the sky as possible, you will need a good wide-angle lens. Look at the Tamron SP15-30mm Di VC USD (model A012) if you are using a full frame camera or the Tamron 10-24mm Di II HLD (model B023) if you have an APS-C sized sensor camera.
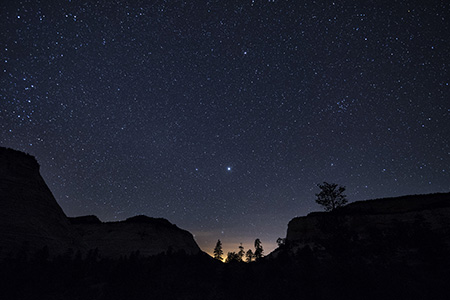
Image captured Zion NP using Tamron’s SP15-30mm Di VC USD (15mm, 25 Sec,, F/2.8 @ ISO 3200)
For more info on lenses used in this article go to: www.tamron-usa.com
For more info on the National Park Night Sky Workshops go to: www.nationalparktrips.com