Enewsletter
January 2012
Taking Your Photography to the Next LevelBill Debley shares his top tips to help you become more creative behind the camera. |
Article By Jennifer Gidman Images by Bill Debley |
You've relegated the point-and-shoot to the "been there, done that" pile and are finally ready to take steps toward breaking out of "beginner" mode. Photographer Bill Debley, who conducts workshops in wildlife and landscape photography, as well as one-day workshops called "Photography for the Rest of Us," offers a few of his own best practices for upping the imaging ante. |
Select the best lenses and equipment for your photographic needs. |
Other gear Debley recommends investing in once you're ready to advance to the next level: macro filters or extension tubes (if you don't have a macro lens); a circular polarizer; a 4-stop neutral density filter and graduated neutral density filter; a cable release or wireless remote; a tripod; memory cards; extra batteries; a flash unit with an extension cord; a 5-in-1 reflector; and a white balance device. |
Learn by looking at other people's work. |
Experiment with different techniques. |
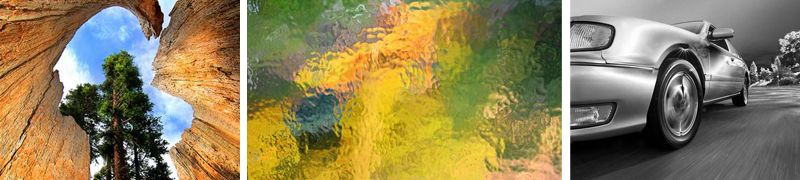
Some of his own favorite techniques include using mylar foil (shooting reflections in the mylar to create awesome abstracts); doing what he calls the "twist n' shoot" (using a slow shutter speed of less than 1/20th of a second, keeping the subject in the center of the lens, and rotating the camera almost a full turn); painting with light (using a strobe, flashlight, or 12v automotive spotlight to "paint the scene"); and playing around with high-key and low-key techniques.
|
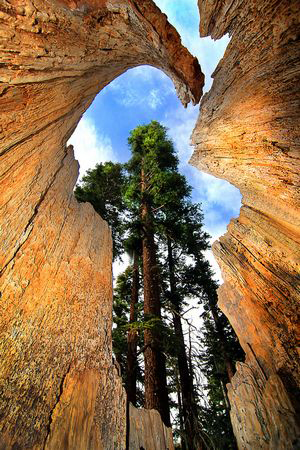
Debley's 10-24mm lens is indispensable - for both landscapes and a variety of other applications. "I was in the ghost town of Bodie, California, for example, after the good light was gone but with a wealth of subjects I still wanted to photograph inside the buildings," Debley recalls. "I took the lens hood off of my Tamron 10-24mm lens, placed the lens against a window, and gently clamped the camera against the glass with a small amount of forward pressure, which stabilized the lens. I metered the scene and used a shutter speed that was between 1 to 3 seconds (depending on the depth-of-field I chose for each shot). I was amazed at the images I was able to get using this technique." |
Choose your subject and eliminate everything else - and stay away from the frame line.
|
Learn to control your depth-of-field.
|
"The three main elements that control depth-of-field are aperture (f-stop), focal length of the lens, and subject distance," he says. "Because focal length is an integral part of depth-of-field, when you zoom and don't change anything else, your depth-of-field can go from many feet to mere inches, resulting in ruined shots."
|
Debley recommends experimenting with these three parameters by using a row of fence posts, railroad tracks, or rural mailboxes, for example, selectively picking a point of interest that's in sharp focus and blurring the rest of the scene. Another suggestion: downloading a free DOF calculator from www.DOFmaster.com (the tool also comes as an iPod or iPhone app). |
Use your histogram. |
Which leads to Debley's next rule of thumb: Don't rely on post-processing software to create your image. "You can use high-dynamic range (HDR) software to increase the dynamic range of an image, but with an HDR image, people often either really like it or don't because it's an HDR image, especially if you overdid it with the sliders," he says. |
Instead, get the shot in-camera and don't depend on software to fix the photo. Employ such aids as reflectors, flash units, neutral density filters, and polarizing filters in more challenging lighting situations. "For example, if you're shooting midday and the shadows are harsh, a wink of fill flash or using a reflector disc on your subject softens or removes that harshness," Debley says. |
Don't ignore white balance. |
The white balance presets in your camera are also extremely useful. "For example, if it's later in the morning and that nice, warm early-morning light is gone, use the 'Cloudy' setting on your camera to warm up the scene," he says. "It makes the image look like it was taken an hour earlier." Try all settings while photographing the same subject to view all the different effects that are possible. |
Tell the story.
|
Above all, Debley advises not to get discouraged, because your images will get better: "As Ansel Adams said, 'Twelve significant photographs in any one year is a good crop.'"
|
To see more of Bill Debley's work, go to www.fstopscameraclub.com or email him at billdebley@gmail.com. |
QUICK-TIP CHEAT SHEET |
Avoid camera shake when handholding your camera. |
Get to the same level or below your subject for a pleasing perspective that aids composition. |
Make sure your image has balance. |
Use more vertical crops. |
Control your background. |