
Enewsletter
Photographing Star Trails
Ed Heaton dabbles in astrophotography with his Tamron SP 10-24mm wide-angle and SP 15-30mm VC lenses.
By Jenn Gidman
Images by Ed Heaton
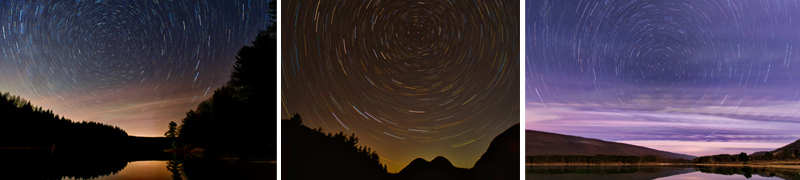
Taking pictures of the night sky can be one of the most ethereal, peaceful experiences you have as a photographer. After dark is one of Ed Heaton's favorite times to head out with his camera, especially to capture star trails—a phenomenon in which the stars appear to move in your image as the Earth slowly spins under the sky. "I not only love the pictures I'm able to achieve, but it's also relaxing to capture them," Ed explains. "You're out there for an hour or two, in nature, hanging out and talking while the camera just does its thing. It's a lot of fun."
Although he prefers to find a location as far away from civilization as possible to escape the light pollution that's common near more populated areas, Ed's also been able to scope out perfect positions for capturing star trails right in his own backyard. "I'd much rather head out into the wilderness, but I don't always have the opportunity to do so, and I've found you can still get some great images even when there's more light," he explains.
His recommended lens of choice for capturing star trails: a wide-angle lens such as the Tamron SP 10-24mm or the new Tamron SP 15-30mm VC. "You want to be able to see as much of the night sky and the stars as possible, as well as any surrounding landscape scenery or foreground elements," he explains.
Shooting on a moonless night, such as one in which a new moon is present, is preferable, and Ed looks for dark skies in which there are few or no clouds so the stars show up better. "But there are situations in which I can also shoot with a full moon," he says. "In those cases, it almost looks like I'm light-painting the other elements in the photo."
Before he starts his star trail sessions, Ed first decides on his location—way before it gets dark. "You can't just wander outside at dusk and decide you're going to start photographing star trails," he says. "I know this from experience: I can't tell you how many times early on I decided on the spur of the moment to take pictures of star trails and had no idea where to go. You also want to find a scene that has some compelling foreground elements so that your images aren't just all stars."
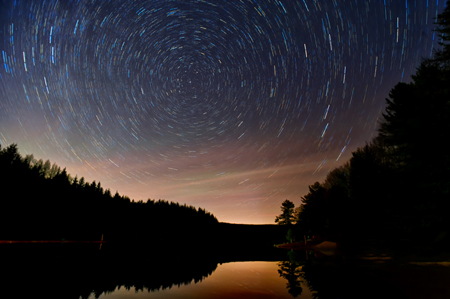
A solid tripod and cable release are musts, as is a compass to find the North Star, the focal point most often used by photographers seeking to take star trail photos. "You can achieve other types of star trail photos—like vertical streaks that fall through the sky—if you photograph facing in another direction other than north," he says. "But I typically focus on the circular star trails you get around Polaris, because that's more visually appealing and what people are usually looking to see when they seek out star trail photos."
The first thing Ed does when preparing to photograph star trails is set his camera to manual focus. "I typically carry a flashlight to light something that's at infinity," he says. "If I can't do that, I just set my lens to infinity. Then I switch my lens over to manual focus, because I don't want it to hunt or fish when it's in between shots, which it will because it's dark—there's nothing out there for it to latch onto."
Ed also figures out his exposures before he starts taking pictures. "Most cameras have an intervalometer built in, though I use one that plugs in," he says. "What I'll do is take a couple of test shots, maybe a minute or 30 seconds long each—whatever I can get away with. If I need to push it out for a longer exposure or if it's bright out and I can shorten that up, that's what I do before I start taking pictures."
Experimenting with shutter speeds is necessary because each night scene is different. "One time you may be staring up at a really dark sky, the next time there may be light pollution from a Wal-Mart 15 miles away," he says. "That makes a huge difference in how long you can go. As far as apertures, I usually shoot pretty wide open. Right now I'm loving this new 15-30mm lens, which goes down to F/2.8, so I can open it all the way up to that and pull off some really great photos. If you can open up to 2.8, 3.5, 4.5, somewhere in that range, that's ideal."
His white balance for star trails is also always set ahead of time when he's photographing star trails. "I never leave the auto white balance on, because as the night sky gets darker, it changes the white balance," he says. "So I'll usually pick a white balance before I start firing off my photos—it doesn't really matter which one I select, as long as they're all the same for consistency."
Ed usually keeps his ISO between 100 and 400 for his star trail photos, and he always turns the noise-reduction feature off. "I want that continuous shot," he says. "I don't want my camera to shoot for a minute and then run through noise reduction for another minute. If you have it on, it shows up as a gap and you don't get that smooth flow in your stars."
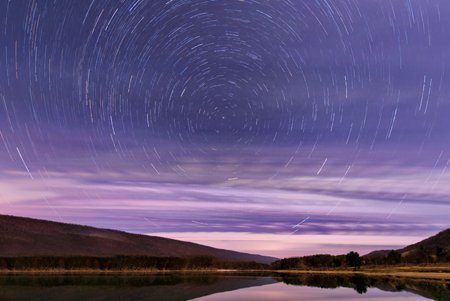
Ed stacks all of his various exposures afterward into one image in Photoshop, an automatic feature he says is simple and quick. "In New Germany, a state park in Maryland, I took a 31-minute set, with each exposure lasting 5.25 minutes," he explains. "A photo of Octoraro Lake was made up of a set of 66 images that took 60 seconds for each exposure. And at Rocky Gap, another state park in western Maryland, the entire set of photos took 37 minutes, with each exposure lasting 60 seconds."
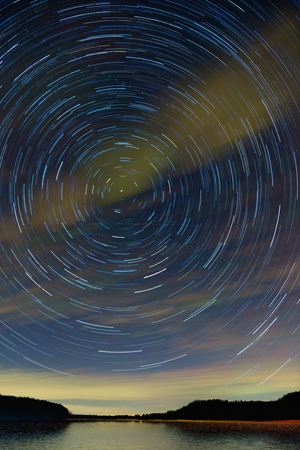
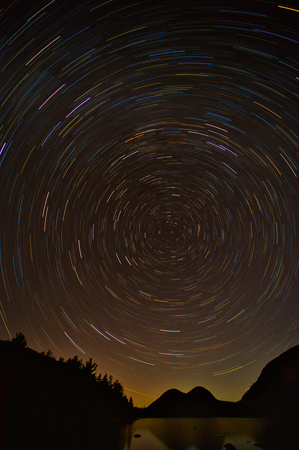
"For an image at Jordan Pond, I captured 15 photos at five minutes each," he says. "This final image ended up showing all of these amazing colors in the star streaks. It's an astronomical question about how those colors get in there. I don't add any of those colors in—it's kind of wild!"
Finally, for an image of a local windmill, Ed took advantage of the night's full moon. "Remember I said earlier you can pull off certain photos in full moonlight? This was one of those images," he says. "The moon was so bright that it was like daylight. It makes it look like I light-painted the windmill."
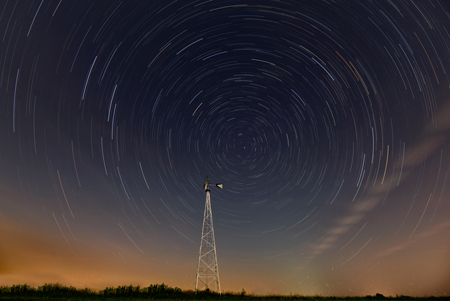
Ed wanted to create a composition that captured the star trails but added something in the foreground to enhance the image. "That's where the windmill came in," he says. "I took 35 images, each one about two minutes long. What's interesting is that the windmill looks like it's 100 miles away, but it was literally 25 feet from me. And those tiny bright lines at the bottom, right above the treeline? Those are lightning bugs that were just coming out for the evening. It turned out to be a cool photo."
To see more of Ed Heaton's work, go to www.edheaton.com.