Enewsletter
September 2014
6 Tips for Photographing Fall FoliageEd Heaton heads out with his Tamron SP 24-70mm VC and SP 10-24mm lenses to capture the brilliant colors of autumn. |
Article by Jenn Gidman Images by Ed Heaton |
The crisp mornings and cool evenings of fall are a big part of the season's draw for photographer Ed Heatonbut it's mostly about the color. "Color is a natural compositional element, so autumn is the perfect time to use that color as key elements in the images I'm shooting," he says. |
Each year, Heaton heads out to the Grand Tetons to photograph the foliage in the West, then returns home just in time for peak season in Pennsylvania. "Timing is crucial," he says. "If you go too early, the leaves haven't changed; if you go too late, all the leaves are already off the trees. You really have to stay on top of things to know what the peak times are in different parts of the country for the best images." (Check out the Weather Channel's foliage maps for optimum leaf-peeping times near you.) |
Ed uses the Tamron SP 24-70mm VC lens, as well as the SP 10-24mm wide-angle lens to capture Mother Nature's show. "When I want some exaggeration and something a little wider, the 10-24 comes into play," he says. "But the 24-70 is my go-to lensthe focal-length range is terrific, and it offers a view that's more like what people are normally seeing with their eyes. Plus it's so sharp and offers me the image quality I want to make my fall foliage images stand out." |
Read on for Ed's tips on how to capture stunning autumn images of your own. |
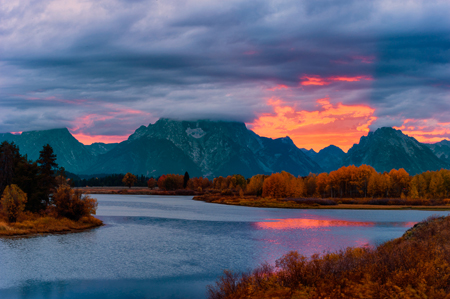
Look for dramatic light to complement the fall colors.
|
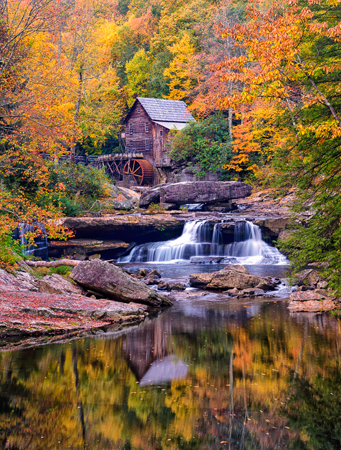
Don't be afraid to break tried-and-true compositional rules. |
The rule of thirds is usually an effective way to achieve a visually appealing image, but this image is pretty much split down the center: 50 percent on the top, 50 percent on the bottom. Whenever you have a reflection on the water like this, you get double the bang for your buck: There's a great image up top that balances out nicely with the reflection on the bottom half. Plus, the mill's rusted red wheel added such a colorful touch to complement the leaves on the trees.
|
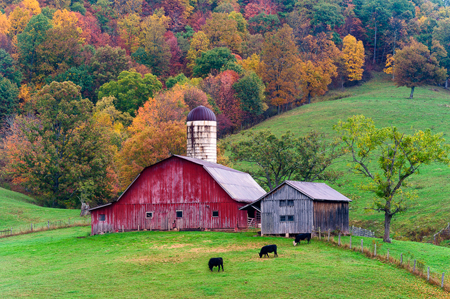
Balance your image through shapes, lines, and even other elements for a sense of scale.
|
As for the cows in the image, I got lucky. When I first started shooting, they were all grouped together. I whistled and they all ran out there. I love how they just all neatly lined up to provide a little more separation. That was pure serendipity, and I was glad to be able to capture the moment. |
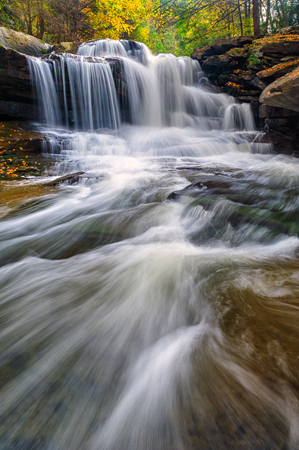
Add depth to your scenes.
|
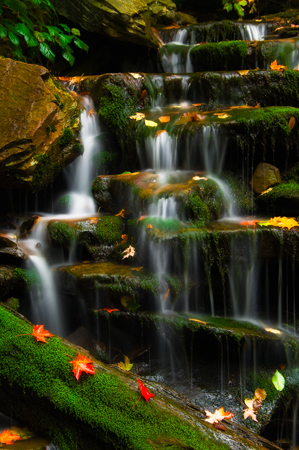
Shoot on an overcast day to make the colors pop.
|
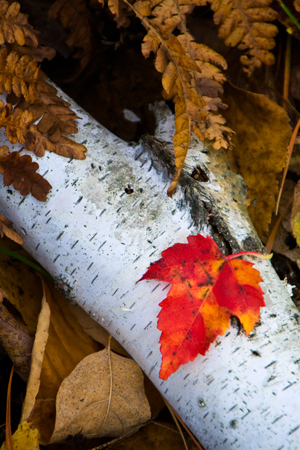
Look for color and contrast up close. |
I took this picture of a red leaf against a white birch near Pine Creek Gorge, also known as the Grand Canyon of Pennsylvania. I was photographing a grove of birch trees when I saw a downed tree off to the side. I found a red leaf nearby and placed it on the white birchI knew it would offer a wonderful contrast. There are advancing and receding colors: Saturated colors (reds, for example) are advancing colors and pull forward, while earth tones (like the browns and yellows) are receding colors. Position a red leaf with an earthy tone and the white birch as the background, and that leaf will come forward in the image.
|
It's helpful to also think of colors that are opposite of each other on the color wheel. Reds and greens work fantastic together, for example, because they're opposites. Don't be afraid to get creative: Sometimes a color combination isn't "supposed" to go together, but it looks terrific in certain situations. Sometimes you just have to go with your gut. |
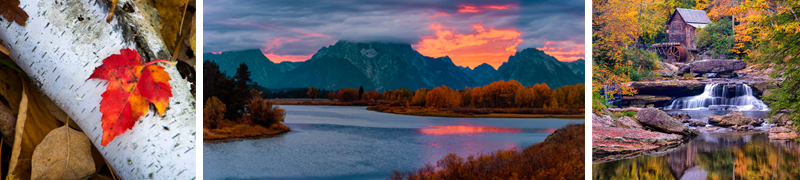
To see more work by Ed Heaton, go to www.edheaton.com. |