Enewsletter
November 2014
Top 5 Post-Production TipsJanice Wendt illustrates how to accentuate your subject and add impact to your photos. |
Article by Jenn Gidman Images by Janice Wendt |
Janice Wendt has been taking pictures since she was 8, but she's also a renowned retouching and image enhancement expert. When she adjusts her photos in post-production, she knows just what it takes to bring the important elements forward and minimize the distracting ones. Here are her top five tips for harnessing software editing programs to make your own photos more compelling. |
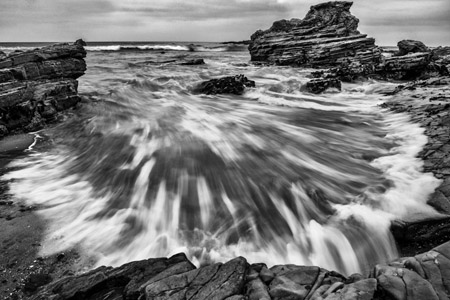
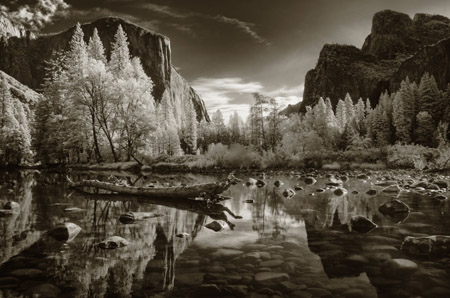
Work in black and white or sepia to bring out contrast.
|
Meanwhile, this picture I took in Yosemite Valley was shot in infrared and was an HDR image. The reason I went for this look rather than a straight black-and-white photo is because I love the tone value here; it's more welcoming and softening.
|
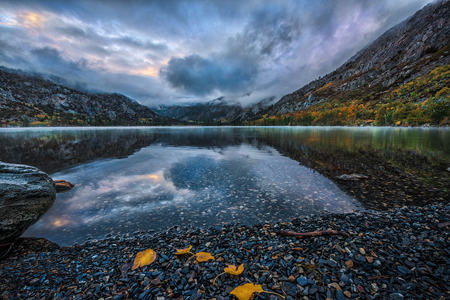
Tie in colors and tones from different parts of the image.
|
In post, I wanted to help bring the sunrise forward and warm the light up to give it a different tone, as well as tie into the color of the leaves in the foreground. I pulled that light forward a bit and added some structure (localized contrast), then slightly warmed the light coming through the clouds so that warmth could somewhat contradict all the cool tones in the rest of the image. And that was the warmth that I could actually see-I didn't add any colors, I just brought them forward in the image. |
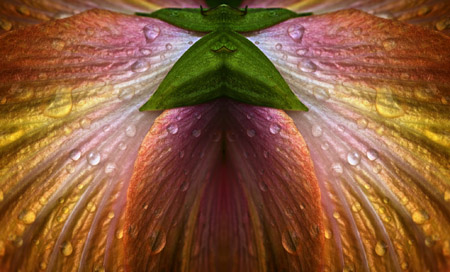
Bring out the detail in especially vibrant colors.
|
Create a mirror image.
|
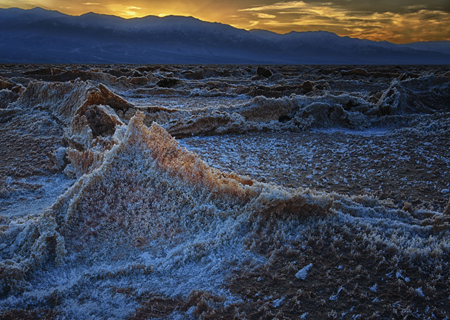
Darken or lighten to draw the subject's eye to the main subject.
|
Because there's so much busyness going on in Death Valley scenes, I needed to create a focus for the viewer to latch onto. I noticed when I was shooting that there was this nice backlight coming through the salt crystal pile. The sky has such a warm glow that contrasts with the coolness of the mountains and the salt, but I didn't want the viewer's eye to go to the sky first. So in post-production, I illuminated and lightened that backlight coming through the salt crystals. That brought forward what I wanted to be the most important part of the image. |
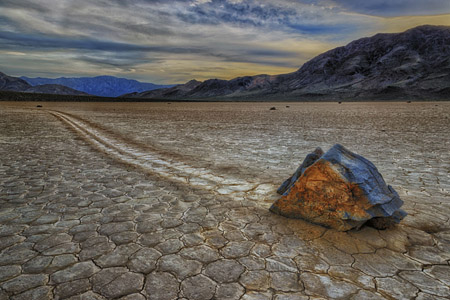
Death Valley's Racetrack is another place where I was able to alter the image digitally to bring out what I wanted. The rocks on this dry lakebed, also known as the playa, get pushed along by the very strong winds there, especially after it rains and the playa is slick. Every time I go out there, the tracks are different, and the rocks are in a different place. I took this image with my Tamron SP 24-70mm VC lens, lying flat on the ground level with the rock (I bring kneepads so I can get those kinds of angles).
|
The day I went out there to shoot technically wasn't a great day for photos: There wasn't anything dramatic that stood out in the sky or the background, so I created an HDR composite-I knew that would help me when I worked in all the different levels in post-production. With all those textures in the playa, it can be overwhelming and you can lose track of what the subject is; I also wanted to make sure when I framed it that I had the leading lines of the rock trail. So when I retouched the image, I darkened the cracked ground of the playa except for the rock trail, which I lightened to bring it forward in the image. I also illuminated the shadow portion of the rock to bring the colors in it out. |
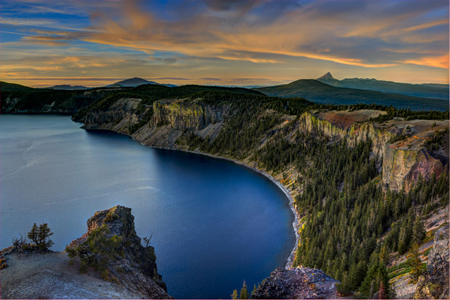
Crater Lake in Oregon was an HDR image as well. In the distance, on the right-hand side of the frame, you can see a little forest fire happening. I drove around the lake three times before I picked my location and then waited for the sunset. The water ended up looking really dark, so I lightened it a bit so it didn't look like a black hole. Meanwhile, the foreground was too light, so I had to darken that so the viewer doesn't get fixated on the irrelevant elements there-what's really important are the mountains in the background and the cliff faces leading toward them. The details in those rocks help lead your eye around the image.
|