
Enewsletter
March 2014
How to Shoot HD Video With Your DSLRPhotographer Jonathan Thorpe offers five tips for commercial video work using his Tamron SP 24-70mm VC lens. |
Article by Jenn Gidman Video & Images by Jonathan Thorpe |
Jonathan Thorpe has made a career out of quirk in the commercial photography arena. But while his bread-and-butter used to come from still photos, he's been delving more into HD video using his DSLR, shooting music videos and TV commercials for Fortune 500 companies such as Dodge and Fiat. "More and more companies are leaning toward video," he says. "They're not doing print ads - they're doing short video spots. I recently did a fashion catalog for a clothing store, and on the website you can see five-second video clips that show the models from that catalog." |
Jonathan uses the Tamron SP 24-70mm VC lens on his DSLR for commercial video work. "The focal length on that lens is terrific," he says. "I don't like switching lenses while I'm shooting a video. With the 24-70, I get that wide end at 24mm, then am able to go all the way up to the more telephoto 70mm end for a tighter portrait look. I love being able to shoot in close quarters, and the Vibration Compensation feature allows me to do more work handheld than I was able to do in the past. That lens has sped up the whole filming process for me." |
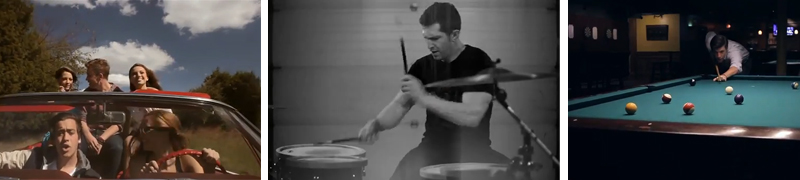
Check out this reel of Jonathan's video work using the Tamron SP 24-70mm lens. Here are Jonathan's quick tips for achieving sharp, eye-catching video on your own DSLR. |
Pick a shutter speed that works with your frame rate. |
However, it all comes down to the story you're trying to tell and how you want to tell it. For instance, on some of the high-speed commercial ads I've done, I do crank the shutter speed way up to give the footage that really shaky, almost sped-up motion to it, since that's the story we're trying to tell. |
Use neutral-density filters. |
Manual focus is your best bet. |
Instead, set your camera to manual and use what's called a follow focus, a mechanism that mounts on the side of your camera using a rail system. You just turn the follow focus knob on the side of the rail to adjust your focus. The device has the equivalent of a small dry-erase board on which you set your marks. For example, if you have a subject walking from Point A to Point B, mark those two points and then focus in between them. |
Master the art of tracking. |
This is where the 24-70's Vibration Compensation helps me get sharp images. That said, I'll sometimes turn the VC off to get that shaky, jerky motion I mentioned earlier. That type of more organic-looking footage is in high demand these days. |
Some DSLRs also have great visual recognition built in to help filmmakers. That feature in my DSLR really works well when I'm tracking a person: It stays on him or her through the entire tracking sequence. |
Use external audio. |
While some people swear they've had success with wireless microphones, I stay away from them - I never know what quality I'm going to get. The best way to ensure decent audio is to use an external preamp instead of recording directly into your DSLR. Simply run XLR cables from the microphone into the preamp, then connect the preamp to the camera. The reason it's so much better this way is that when you start to increase the gain in the camera itself, you raise what's called the noise floor, which introduces static into the audio. By controlling the gain in the preamp, you eliminate that added static. |
Another great option is to use a sound recorder. You control the audio coming into the sound recorder much like you would on a preamp. The benefit to this method is a) it's more affordable (a preamp can run you up to $1,000, while a sound recorder is around $100), and b) you're recording the sound into the camera and recorder at the same time, so you have two backups of your audio. It still sounds awesome. |
To see more of Jonathan Thorpe's work, go to www.jthorpephoto.com. |