Enewsletter
June 2013
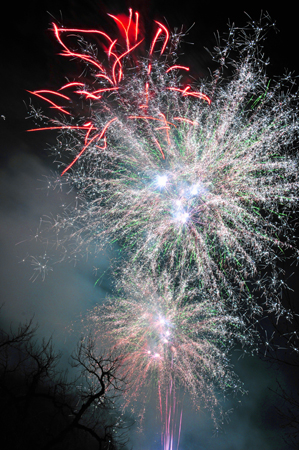
Photographing the PyrotechnicsTamron tech rep Jeff Allen offers tips and tricks to ensure amazing fireworks photos on July 4. |
Article by Jenn Gidman Images by Jeff Allen |
Independence Day is right around the corner, but fireworks aren't just for the Fourth of July anymore. "They're used for sports team championships, grand openings of shopping malls, New Year's Eve - you name the type of celebration and there's probably a fireworks show for it," Tamron technical representative Jeff Allen says. |
Jeff offers his tips for capturing the rocket's red glare (minus the glare), with all of the brilliant colors and excitement you witnessed with your own eyes.
|
Pick your lens. |
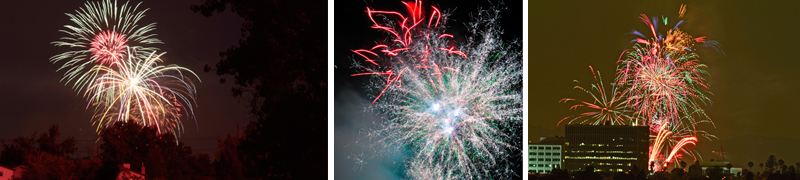
If you're further away from the display, a longer lens like the SP 200-500mm lens would be ideal. Last year I was working an event in California, and my hotel was about 10 miles south of Disneyland, where they have a nightly fireworks display. I went on my balcony (my room was on a high floor, directly facing the park) with the 200-500, a sturdy tripod, and a cable release, and I was able to get some great images with my lens zoomed all the way out.
|
Use a tripod and cable release when possible. |
The downside to travel tripods is that they're less sturdy, so you're more likely to get blurry pictures. One tip to keep everything steady is to hang the strap of your camera bag or backpack around the three legs, which weighs the tripod down and adds stability. |
A remote cable release is also a smart idea. There are many inexpensive wireless remotes that have come onto the market in the last couple of years to give you more flexibility. If you don't have a cable release, you can also use the self-timer mode so the camera shoots at a particular time rather than risking moving the camera when you press down on the shutter button. Of course, using a Tamron lens with the Vibration Compensation (VC) feature also helps. |
Break free from relying on automatic. |
Similarly, get away from using autofocus. Your camera will try to focus in between shots or when it's dark and may not have anything to grab onto while it's hunting. Whether I'm handholding or on a tripod, I'll zoom in for the first couple of bursts, get my composition where I know it's going to look good, then set my focus. |
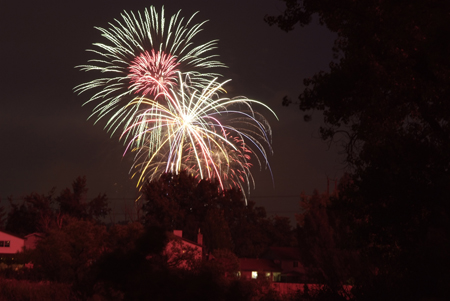
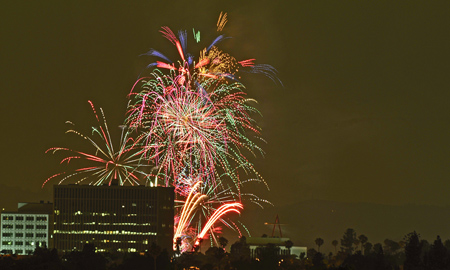
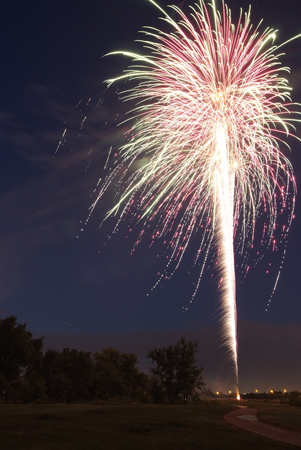
Set up safely and with an eye for the best vantage point. |
Let your vantage point guide your composition. |
If you're closer to the show, however, vertical images are probably better. I usually shoot vertically so I can get that trail of sparks leading up to the burst and also add context to the image. You're somewhat limited shooting fireworks horizontally in most cases - unless you shoot the bursts in the air, there's less chance of getting the foreground details and the fireworks bursts in the frame because of the aspect ratio. Either way, even the shortest fireworks displays are at least 10 to 15 minutes long, so do a mix of both and play around.
|
The advantage of having a zoom lens such as the 18-270 or 28-300 is that I can zoom in to the burst of fireworks and fill the frame with the exploding shells, then zoom back out to get a wider picture and maybe include more details. One of my favorite handheld shots I did shows an American flag lazily blowing in the breeze, with fireworks bursts on the other side of the frame. Including some foreground detail may make sense and add context in certain circumstances.
|
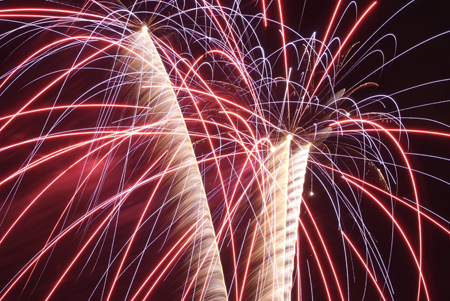
Set your ISO, aperture, and shutter speed for optimum effect. |
In terms of aperture, I generally find that F/8 or F/11 works best when I'm shooting up close or on a tripod. If I'm really close, I'll go to F/16. I'll usually try to get multiple bursts in each frame - my exposures will be 5 seconds to 15 seconds. If some shells are going up more slowly, I might go to 30 seconds, but generally it won't be longer than that, since I don't want everything to wash out. |
Experiment with flash. |
Handhold your camera for the grand finale. |
Work with the smoke, not against it.
|
Follow Jeff Allen on Twitter (@TamronTechJeff) or on Facebook. |