Enewsletter
February 2012
Working Around Old Man WinterRick Sheremeta offers tips on how to control exposure and color temperature to capture beautiful snow scenes. |
Article By Jennifer Gidman Images by Rick Sheremeta |
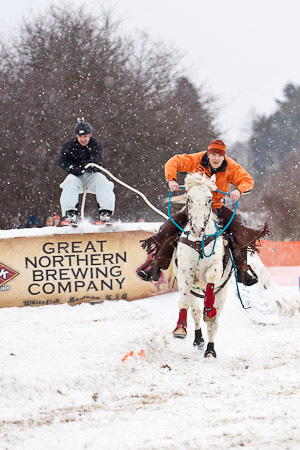
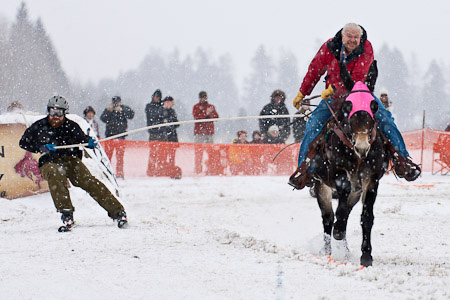
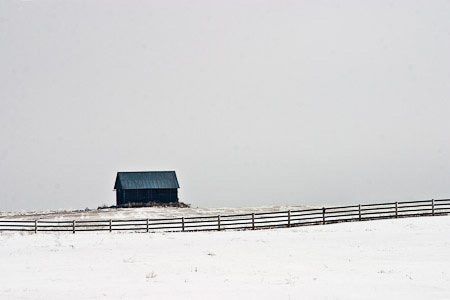
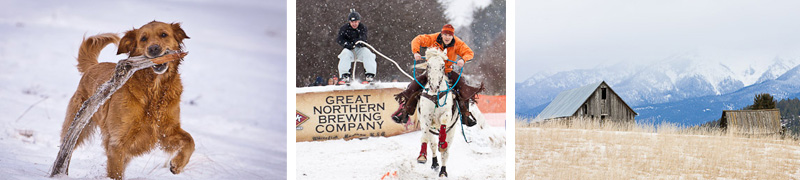
In Rick Sheremeta's neck of the woods in Somers, Montana, the subject that's most often in front of his viewfinder during the colder months is the winter landscape itself. However, not every section of snowy scenery is quite the same, and not every day presents identical climatic conditions - which means his photographic process (especially when it comes to white balance and exposure) needs to be adjusted accordingly, whether he's capturing the action at the World Skijoring Championships or a lone fence post isolated against a glacial backdrop.
|
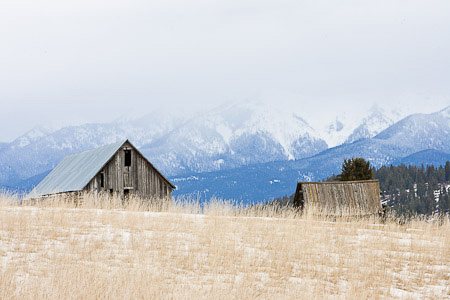
Sheremeta, who relies on his Tamron SP 70-300mm F/4-5.6 and 18-270mm VC lenses, among others, to capture his snowscapes and ice-engulfed subjects, emphasizes the important of white balance in relaying the mood of the frozen vistas. "Color temperature has a significant role in how an image is perceived and the feel it creates," he explains. "I personally find that winter scenes often look better if the shadow areas - and sometimes even the other areas - have a bluish cast rather than a warmer, yellowish light. That blue cast enhances the feeling of the frigid conditions." |
Because he shoots mainly in RAW, Sheremeta typically sets his camera to "Auto White Balance" when shooting outdoors. After capture, if the color temperature doesn't seem quite right, he adjusts it in post-processing. He uses Adobe Lightroom 3 for all his image cataloging, as well as any white balance, exposure, or tonality corrections needed. "Shooting in Auto seems to work just fine for almost everything I photograph," he says. "But if I have an image up on my computer screen, I might try a few of the preset white-balance values to see if that improves the image." |
Dealing With the Bright White |
The most challenging part of any type of photography, and especially winter imagery, is usually exposure. "How and what you meter controls a scene's overall exposure," Sheremeta says. "In winter, most if not all of what I refer to as my 'natural metering guides' (grey rocks, foliage, etc.) may be buried under snow. Therefore, my thought processes for metering and exposure need to take on a totally new approach during the 'white months.'" |
The weather dictates Sheremeta's metering technique. "Bright sun on white snow has a dramatic influence on meter readings, resulting in grossly underexposed shots unless some plus exposure compensation is employed," he says. "I prefer to use Spot Metering, but if your camera doesn't have Spot Metering capability, Partial or Center Weighted will work, as long as the entire frame is filled with what you're metering - for example, the sky or snow."
|
When he's shooting those sunny winter landscapes, Sheremeta first meters the northern sky to get an idea of what a normal or neutral exposure might be. "Then, deciding on an aperture that's appropriate for the depth-of-field I need, I'll adjust shutter speed, using Manual camera mode, until my meter reads in the center, or neutral, exposure," he says. "If I want a little more saturation, I'll opt for -1/3 to -2/3 exposure compensation, depending on how light or dark I want the sky to be relative to everything else. Then, without touching any controls, I meter just the brightest snow to see what kind of reading I get: If it's over +2 (which I would expect in bright sunlight), then I know that some or all of the snow may be blown out and overexposed."
|
After this initial exposure, Sheremeta takes a test shot and reviews the preview image and histogram. "Setting camera controls for overexposure alert or preview blink ('blinkies') on overexposure really assists greatly in the decision-making process when viewed in conjunction with the histogram," he explains. "Generally, I want to adjust exposure to eliminate or minimize any overexposure to maintain highlight detail; however, brightly lit white snow has little or no detail, so some overexposure is to be expected and is OK." |
If all of the snow or sky is blinking, or if an important part of the image is overexposed, Sheremeta decreases exposure by increasing shutter speed, stopping down the aperture, or lowering the ISO - although certain shadow areas may end up underexposed. "It's a good idea to take a few bracketed frames, decreasing exposure compensation in 1-stop increments to see how it affects the histogram and blinkies," he says. "This is especially helpful until you get a better feel for how a sunny snow-lit scene might best be depicted." |
Glacial Gloom |
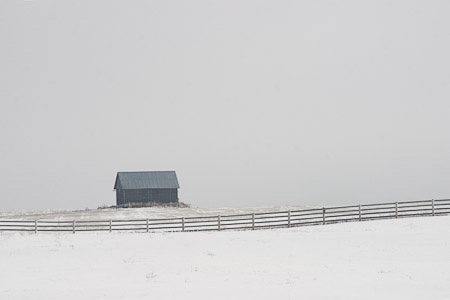
On an overcast or foggy winter day, when overall exposure is more or less uniform, Evaluative or Matrix metering may work best, says Sheremeta. "Spot or partial metering can certainly still be used, as long as the white areas in the scene are relied on for the exposure reading," he says. "If a dark object is inadvertently metered, it can give erroneous results and should be avoided except in certain circumstances." |
Even on the bleakest days, Sheremeta sets his starting exposure for +1, no matter what camera mode he's using. "I review the histogram to see if any further adjustments need to be made," he says. "Generally, the brighter the objects are, the more positive exposure compensation is required for the scene to be rendered properly. When conditions are overcast, everything is mostly monotone, and the histogram approximates a nice, uniform bell curve - but it should tend toward the right of center, otherwise everything will look grey and drab. Again, it's always a good idea to bracket exposures, but this time in 1/2- or 1/3-stop increments between +1 to +2 compensation." |
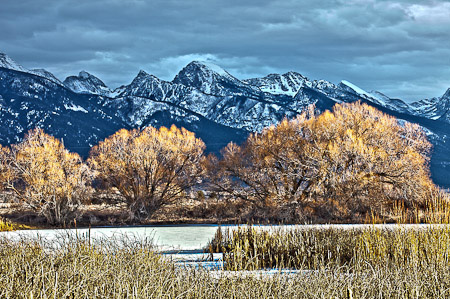
Sheremeta likes to employ special effects on occasion, to either combine different exposures or enhance them. "I'll create HDR images, such as a composite I made of a winter landscape made from three exposures (-1 EV, +1 EV, and +3 EV) using the Surrealistic preset mode in Adobe Photoshop CS5's HDR Pro, with the Tamron 70-300," he says. "Normally, I wouldn't go to +3 EV, opting for more underexposure, but in this instance, the tree trunks were in heavy shadow and I wanted to bring out the detail in that area - everything's a compromise."
|
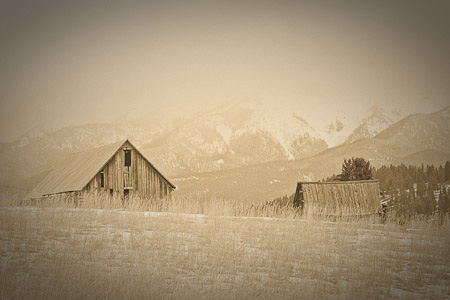
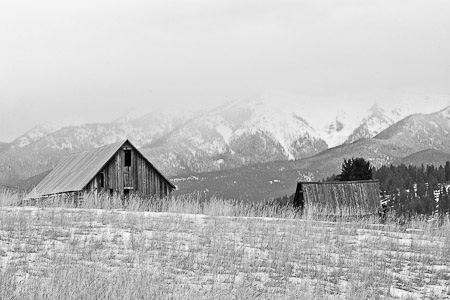
Changing the tone of an image can also make a drastic difference. "Not everything renders well in color," Sheremeta says. "If the lighting is too harsh or the scene is pretty much monotone anyway, as is often the case in winter, I'll experiment with black and white. I always shoot the photo in color in RAW and then convert it to black-and-white in Lightroom or Photoshop. Since the RAW data is always there, nothing is lost in the conversion - I can change the image back to color at any time, or I can create a virtual copy and have both a color and black-and-white rendition. Plus, with a black-and-white image, there are even more opportunities to be creative, including changing the contrast, adding grain or a vignette, or hand-coloring."
|
To see more of Rick Sheremeta's work, go to www.alpenglowproductions.com or his Facebook page. |