Tamron Blogs
Share the article:
More Photo Tips | Video Gallery | Photo Gallery | Enewsletter sign-up
How to Use a Circular Polarizer Filter
You can increase the quality of your outdoor photography with the magic of a circular polarizer. Whether you're capturing landscapes, portraits, or cityscapes, this essential tool offers excellent control over reflections, glare, and color saturation. Learning how to use a circular polarizer can enhance your photos. It helps to reveal more details and colors that reflections and glare might obscure.

Click image to view larger
Circular polarizers, also called cpl filters, are a staple in all photographer’s camera bags. Landscape photographers in particular often use circular polarizer filters. They can also be useful for taking pictures of cars, street scenes, and objects in sunny conditions.

Click image to view larger
A circular polarizing filter is similar to your polarized sunglasses. Wearing your sunglasses reduces glare and makes colors more saturated. The filter will help you to achieve similar results by filtering out light that causes distractions.
Landscape photographers seek vivid blue skies with billowy white clouds, and no distracting glare on lakes and reflective surfaces. Using a circular polarizing filter achieves this effect in-camera. Opting for in-camera corrections minimizes the post-production editing process.

Click image to view larger
When is a circular polarizer useful?
• The filter will provide increased saturation of the blue sky, allowing the white clouds to pop.
• When taking photos of green or autumn leaves in bright sunlight, they may appear less vibrant. Using a polarizer filter can help reduce glare and reflections on the leaves, making their colors appear more vivid.

Click image to view larger
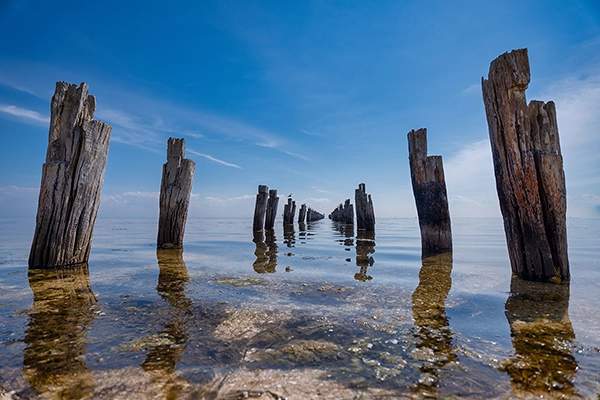
• Using a polarizer when photographing water can reduce sun glare and improve visibility of underwater rocks.
Click image to view larger
• To keep the colorful reflection of light, such as the orange sunset on wet rocks, remove your polarizer. The polarizer will remove the color and reflection.
• To keep the reflection in windows and water, such as a building in a puddle, consider removing the filter. If the filter doesn't give you the desired effect in your final image.
• When you are taking pictures of cars, use a polarizer to reduce glare from the car's metallic surfaces or windows. This will allow you to see inside the car more clearly.
• A circular polarizing filter works best with reflected light. If there is no reflected light, you will not get any polarized effect. You should not use a circular polarizer at night or in extremely shady areas. Using the circular polarizer in well-lit areas is best for optimal results.
• When using a polarizer on your camera lens, you may need to adjust your settings to compensate for the reduced light. This could mean using a longer shutter speed or a higher ISO to achieve the correct exposure.
What is a circular polarizer and how does it work?
A circular polarizer is a camera lens filter that reduces reflection and glare. It also makes colors appear more vibrant in outdoor photos.
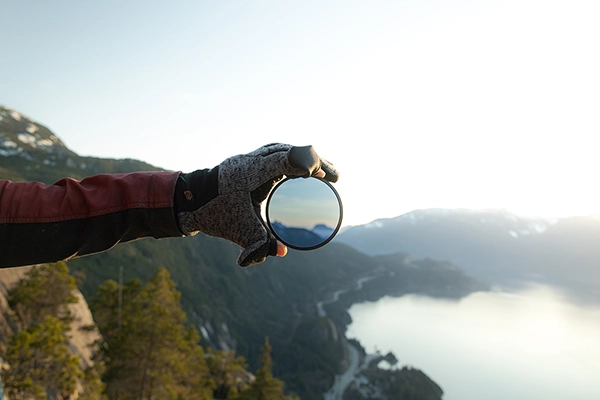
The filter has two pieces of glass sandwiched together. The linear polarizer glass blocks light waves from certain directions to reduce glare and reflections. This allows only specific light waves to pass through your lens.
Click image to view larger
The quarter-wave plate comes after the linear polarizer. It changes linearly polarized light into circularly polarized light. This is useful for modern DSLR and mirrorless cameras where the autofocus systems require the polarized light to be circular.
How do I use a circular polarizer?
• If you have a filter that screws onto your camera lens, just screw it onto the front of the lens. Make sure to properly align the filter before attempting to thread it on to prevent damaging the lens' filter thread.
• Forcing the filter can strip the thread, so take care when attaching it. The filter should screw on smoothly. Ensure that it is securely attached.
• Circular polarizers are also available in square format systems. In this case, the filter holder will screw into the front of your lens, and the filter will slide into the holder.
• While looking through the camera viewfinder or the LCD screen, rotate the outer ring of the circular polarizer. You will see the changes in the reflections or sky as you rotate the filter. You can dial the filter to the position that provides you with the saturation intensity you prefer. Note that sometimes, the blue sky may become too dark and over saturated looking, which may not be to your liking.
• The effect varies depending on the angle of the sun relative to your shooting direction. Usually most effective when the sun is at a 90-degree angle to your lens.
• When you are taking pictures of reflections on water, glass windows, or shiny surfaces, adjust the filter. This will help reduce glare and reflections. This will help bring out the details and enhance the colors in your subject.
• Adjust the polarizing effect to get the best colors when taking pictures of blue skies and foliage.
• Landscape photographers need to pay particular attention when using a polarizing filter. When using a filter with an ultra-wide-angle lens, be careful of uneven polarization. This can make the sky appear unnatural.
Using Circular Polarizers on Tamron Lenses
One of the advantages to owning more than one Tamron lens is the common filter size shared by many Tamron lenses. Whether they are wide-angle, all-in-one, to standard, telephoto or prime lenses, many Tamron lenses have the same 67mm filter thread, so you can purchase just one polarizer, and use it on any of your lenses.
Conclusion
A circular polarizer can improve your outdoor photos by reducing glare and reflections. It also enhances colors and contrast. By following the guidelines in this blog, you will successfully increase the quality of your images by using a circular polarizing filter to your advantage.
Related Articles
Must Have Accessories: Filters
More Photo Tips | Watch Videos | Learn More About Tamron Lenses | Photo Gallery